A Plum Amazing guide for Mac
yKey Pro
Make your first useful Mac shortcut, then explore commands, contexts, menus, voice and AI at your own pace.
App version 3.0.0 beta (6) Updated 2026-10-10
Version 3.0.0 beta, build 6
Beta change log#
| Build | What changed | Reported by |
|---|---|---|
| 6 · October 10, 2026 | Opens this web manual from the app’s help controls, including six previously inactive question-mark buttons. Bundles the same updated manual for AI Coach. | — |
| 5 · October 9, 2026 | Stops repeated save-error dialogs after the evaluation ends. Identical disk errors are reported once until saving succeeds. | Julian Miller |
| 4 · October 9, 2026 | Recognizes apps already inside Applications, including renamed copies. Confirms replacement before moving a new copy. Click, type and menu experiments remain available after evaluation. | Julian Miller |
| 3 · October 9, 2026 | Fixes a missing runtime component that could prevent launch. Includes integrated branch fixes and a full-feature 30-day evaluation. | — |
This is a beta. Start with a harmless task, keep a backup of your old setup, and report the first step that behaves differently from this guide. You do not need AI to create or run shortcuts. Start with one text shortcut, then return to the deeper chapters when you need them. macOS 14.0 (Sonoma) and later
yKey gives AI agency in our world.
Agency means the capacity to act — to actually do things, not just talk about them. Without yKey, AI is a brain in a jar. It can think, write, and advise, but it can't click a button, move a window, or type into an application. With yKey + MCP, the AI has hands, eyes, and a keyboard. It has agency.
yKey Pro is the bridge between what AI knows and what AI can do.
Table of Contents#
- Welcome to yKey Pro
- Installation & Setup
- Three Steps to Your AI Coach
- Permissions & Security
- Quick Start Guide
- The Editor Window
- Shortcuts
- Commands — The 30 Things yKey Can Do
- Launchers — What Starts a Shortcut
- Contexts — Where Shortcuts Are Active
- Custom Menus
- Floating Palettes
- The Menu Bar
- Import, Export & Migration
- Preferences & Settings
- URL Scheme
- AppleScript Support
- AI & MCP Integration
- Speech & Voice Control
- Giving This Manual to an AI
- Bridge Packs — App-Specific Automation
- Licensing & Tiers
- Getting Help — AI Coach, Support & Community
- Troubleshooting
- Keyboard Reference
- For Previous yKey / iKey Users
- What's New in yKey Pro 3.0.0
- Skills Platform
- Multi-Channel Messaging
- Diagnostics
- Appendix A — MCP Configuration Reference
- Appendix B — Example Workflows
1. Welcome to yKey Pro#
yKey Pro is a macOS automation utility that lets you create powerful keyboard shortcuts, automate repetitive tasks, and — new in version 3.0.0 — let AI assistants control your Mac.
What yKey Pro does:
- Assigns actions to keyboard shortcuts (hotkeys) so you can trigger complex workflows with a single keypress
- Chains multiple actions together into sequences — type text, click a menu, run a script, wait, click a button, all from one hotkey
- Triggers actions based on time, application events, system events and network changes; USB and calendar launcher configuration has beta limitations described in Chapter 9
- Controls any application through keyboard simulation, mouse control, menu access, UI element interaction, and AppleScript
- Connects to AI assistants (Claude, ChatGPT, Gemini, Cursor, and others) so they can operate your Mac through the MCP (Model Context Protocol) standard
Who is yKey Pro for?
- Anyone who types the same thing repeatedly — create text snippets triggered by a hotkey
- Developers who want keyboard-driven workflows across their tools
- Designers who want complex Photoshop/Figma/Sketch operations on a single key
- System administrators who manage multiple Macs
- Power users who want their Mac to work the way they think
- AI enthusiasts who want to give their AI assistant hands and eyes on their Mac
History: yKey has been helping Mac users automate their workflows for over 30 years, originally as "iKey" — one of the first Mac automation utilities ever created. Version 3.0.0 is a complete rewrite in Swift and SwiftUI, bringing modern macOS integration while preserving everything that made the original great. If you've been using yKey or iKey, all your shortcuts can be imported directly (see Chapter 14).
One App. One Download. Four Tiers.#
There is only one app: yKey Pro.
You download one app. You see one icon in your Applications folder, one entry in System Settings, one item in the Dock. Everyone gets the same app.
What changes is what's unlocked inside. A Plum Amazing Store license — monthly, yearly, or lifetime — turns on more features. Without a license, you receive 30 days of all implemented features, including saving. After that, existing shortcuts still run and you can experiment, but new shortcut-library changes are not saved. A new Pro evaluation does not change the license for your original yKey/iKey app. Apple App Store purchasing is planned for later.
| Tier | What You Get |
|---|---|
| yKey | Classic automation — hotkeys, 22 action types, up to 25 shortcuts |
| yKey Pro | + Unlimited shortcuts, 8 new action types, advanced triggers, menus, palettes, import/export |
| yKey Pro MCP | + Tier-gated MCP and AI Action integrations; external MCP requires separate setup |
| yKey Enterprise | Enterprise roadmap: confirm availability before purchasing |
Pricing is being finalized. Check the product page and checkout for confirmed prices and owner offers.
yKey Legacy (the original Objective-C app) is end-of-life. It cannot run alongside this app. Owners of classic yKey or iKey will receive discounted upgrade pricing when purchasing opens.
Mac Guide uses MCP tools inside the app. An external AI client needs a separately configured yKeyProMCP executable. The beta 5 app bundle does not include that standalone executable. See AI & MCP Integration before configuring an external client.
For full details on each tier, see Chapter 22: Licensing & Tiers.
Before You Go Further — Meet Your AI Coach#
This is the most important tip in this manual.
yKey Pro includes a built-in AI Coach — a personal expert that knows this entire manual and can answer any question you have, walk you through creating shortcuts, troubleshoot problems, and suggest workflows you haven't thought of. On macOS 26+, enable Apple Intelligence (free, on-device) during install — see Installation & Setup. Cloud providers cost pennies per question.
After you install yKey Pro, your very next step is Install the AI Coach (included in Installation) and Chapter 3. Once your coach is running, you may never need to read the rest of this manual — just ask the coach.
This is how all apps will work in the future. yKey Pro is one of the first.
2. Installation & Setup#
System Requirements#
- macOS 14.0 (Sonoma) or later for core yKey Pro features
- Apple Intelligence (AI Coach on-device): macOS 26 (Tahoe) or later, Apple silicon, Wi‑Fi for the one-time model download
- Apple Silicon (M1/M2/M3/M4) or Intel Mac (Universal binary)
- Allow room for the extracted app and any optional local speech or AI models. Model storage depends on the model you choose; macOS manages Apple Intelligence availability.
- Internet for license activation and cloud AI providers (not required for Apple on-device AI or core shortcuts)
Installing#
From the Website (Direct Download):
- Download yKey Pro from plumamazing.com
- Double-click the downloaded ZIP to extract yKey Pro.app
- Drag yKey Pro to your Applications folder
- Launch yKey Pro from Applications
This beta is a direct download from Plum Amazing. Mac App Store purchasing is not part of this beta.
If Finder asks whether to replace an app with the same name, choose Replace after quitting the old copy. The app's own Move to Applications button also confirms replacement. An app already inside Applications should not offer to move itself again. Keep the extracted name yKey Pro.app to avoid accumulating differently named copies.
An update announcement may offer Learn More or open the website instead of an Install button. The current beta notice is informational: download and replace the app yourself.
Install the AI Coach (Recommended — Do This First)#
The AI Coach is how most people learn yKey Pro — it answers questions in plain language, walks you through shortcuts, and powers verbal help. Set it up on day one.
Apple Intelligence — our recommendation (free)
| Cost | Free — no API key, no per-question billing |
| Privacy | Runs on your Mac; coach questions stay on-device |
| macOS | 26 (Tahoe) or later on Apple silicon |
| Download | Managed by macOS, downloaded by macOS when you turn on Apple Intelligence |
| Model versions | Apple ships updates with macOS — you do not pick separate model IDs in yKey |
Steps:
- Open System Settings → Apple Intelligence & Siri (or tap Open Apple Intelligence Settings in yKey Pro → Preferences → AI Coach)
- Turn on Apple Intelligence
- Wait for the on-device model download to complete (Wi‑Fi recommended; can take several minutes)
- In yKey Pro → Preferences → AI Coach, confirm Apple (On-Device) is selected — no API key needed
Not on macOS 26 yet? Use a cloud provider (Claude, OpenAI) or Custom API / Ollama instead — see Chapter 3: Three Steps to Your AI Coach.
Cloud & custom providers (when Apple on-device is unavailable)
| Provider | Setup summary | Links |
|---|---|---|
| Anthropic (Claude) | API key + Provider billing | console.anthropic.com |
| OpenAI (ChatGPT) | API key + billing | platform.openai.com |
| Custom API | Any OpenAI-compatible endpoint + model ID | Groq, Together, Gemini OpenAI-compat, self-hosted |
| Ollama (local) | Install Ollama, ollama pull llama3 |
ollama.com |
In Preferences → AI Coach, each provider shows the correct model ID example when you tap Use custom model ID… (e.g. claude-sonnet-4-6 for Anthropic, not a generic GPT name).
Full walkthrough: Chapter 3.
First Launch — Setup Wizard#
On first launch, yKey Pro walks you through four setup steps:
Step 1: Welcome A brief introduction to what yKey Pro can do and an overview of the three tiers (Free, Pro, Pro + AI).
Step 2: Accessibility Permission yKey Pro needs Accessibility access to intercept keyboard shortcuts and control other applications. This is the single most important step — without it, yKey Pro cannot function.
Click "Open System Settings" and follow the steps in Chapter 4: Permissions & Security.
Step 3: Set Up Your AI Coach The wizard prompts you to enable Apple Intelligence (free, on-device) so the AI Coach and verbal help work immediately. Tap Open Apple Intelligence Settings, wait for the download, then continue.
Step 4: Launch at Login Choose whether yKey Pro starts automatically when you log in. Recommended — your shortcuts will be available the moment you sit down.
What's New — Highlights for New Installs#
If you are upgrading from classic yKey or installing fresh, these are the headline features beyond traditional hotkeys:
| Feature | What it does |
|---|---|
| AI Coach | Chat expert that knows this manual and your shortcuts — Chapter 3 |
| Teach mode | Demonstrate a task; yKey suggests shortcuts from your actions |
| MCP server | Lets Cursor and other AI agents control your Mac through yKey — see MCP & Agent Control |
| Speech & Voice Wake | Dictation and hands-free commands — Preferences → Speech |
| Skills platform | Install/share automation packs (.ykskill) — Skills |
| Diagnostics | One-click health check for permissions and engine status |
| iCloud sync | Shortcuts and preferences across your Macs |
See Appendix C: Complete Feature Reference for the full list.
The Menu Bar Icon#
After setup, yKey Pro lives in your menu bar as a lightning bolt icon.
- Filled bolt (⚡): Engine is running, shortcuts are active
- Outline bolt: Engine is stopped, shortcuts are inactive
Click the icon to access quick controls, run shortcuts, and open the editor. See Chapter 13: The Menu Bar for details.
3. Three Steps to Your AI Coach#
This is the single best thing you can do after installing yKey Pro. In three minutes, you'll have a personal expert sitting inside the app that can:
- Answer any question about yKey Pro — instantly, accurately, in plain language
- Walk you through creating shortcuts step by step, tailored to exactly what you want to do
- Troubleshoot problems — "my hotkey isn't working" → the coach checks your config and tells you why
- Suggest workflows you haven't thought of — "I use Photoshop and Finder a lot" → here are 10 automations that will save you an hour a day
- Explain anything in this manual without you having to find it and read it
The coach knows this entire manual. It also knows your actual shortcuts, triggers, and recent activity. So its answers aren't generic — they're specific to your setup.
Cloud providers bill separately from your yKey license. Cost depends on the provider, model, amount of context and number of tool calls. Check that provider's current billing and usage controls before using it. Local on-device models do not incur cloud API charges.
This is how all apps will work in the future. Instead of reading a 100-page manual, you'll talk to a coach that has read it for you. yKey Pro is one of the first apps to ship this way.
Step 1: Choose Your AI Brain (2 minutes)#
The AI Coach needs a language model. We strongly recommend Apple Intelligence on your Mac — it is free, private, needs no API key, and is the fastest way to get verbal help working.
Option A: Apple Intelligence (Recommended — Free)
Available on macOS 26 (Tahoe) and later with Apple silicon.
- Open System Settings → Apple Intelligence & Siri
- Turn on Apple Intelligence
- Wait for the one-time on-device download to finish (managed by macOS; storage and availability vary)
- In yKey Pro → Preferences → AI Coach, confirm Apple (On-Device) is selected
No API key. No per-question cost. Apple updates the on-device model with macOS — you do not pick separate model versions in yKey.
yKey Pro’s first-launch setup wizard also walks you through this step. Tap Open Apple Intelligence Settings if the model is not ready yet.
Option B: Claude by Anthropic
If Apple Intelligence is unavailable on your Mac, Claude is our top cloud pick.
- Go to console.anthropic.com
- Click Sign Up (or sign in if you have an account)
- Once in the dashboard, click API Keys in the left sidebar
- Click Create Key
- Give it a name like "yKey Pro Coach"
- Copy the key — it starts with
sk-ant-and looks likesk-ant-api03-xxxxxxxxxxxx - Go to Plans & Billing and review the current API billing requirements.
That's it. You now have a Claude API key. Go to Step 2.
Option C: ChatGPT by OpenAI
If you prefer OpenAI's models (GPT-4o, GPT-4):
- Go to platform.openai.com
- Sign up or sign in
- Click your profile icon → API Keys
- Click Create new secret key
- Name it "yKey Pro Coach"
- Copy the key — it starts with
sk- - Go to Billing and review the current API billing requirements.
Option D: Gemini by Google
If you prefer Google's AI:
- Go to aistudio.google.com
- Sign in with your Google account
- Click Get API Key in the left sidebar
- Click Create API Key
- Copy the key
- Gemini offers a generous free tier — you may not need to add any credit
In yKey Pro settings, select Google Gemini for its native provider, or select Custom API and paste your compatible endpoint https://generativelanguage.googleapis.com/v1beta/openai/ and model gemini-2.0-flash (or use OpenAI provider with that same custom endpoint).
Option E: Ollama (Free, Runs on Your Mac)
If you want zero cost and complete privacy — the AI runs entirely on your Mac, no internet needed:
- Download Ollama and install it
- Open Terminal and run:
ollama pull llama3.1:8b(smaller Macs) orollama pull llama3.1:70b(32GB+ RAM) - That's it — no API key needed
Trade-off: Local models are less capable than Apple Intelligence, Claude, or GPT-4. We recommend starting with Apple on-device when your Mac supports it.
Option F: Custom API (Any OpenAI-compatible service)
For Groq, Together, Mistral, a self-hosted server, or any other OpenAI-compatible API:
- Open yKey Pro → Preferences → AI Coach
- Select Custom API
- Paste your endpoint (must accept OpenAI
/v1/chat/completionsJSON) - Enter your model ID exactly as your provider documents it
- Paste an API key if required
Step 2: Paste It Into yKey Pro (30 seconds)#
- Open yKey Pro's editor (click the ⚡ in your menu bar → "Open Editor...")
- Click AI Coach in the left sidebar
- Click the gear icon (⚙) to open settings — or use Preferences → AI Coach
- Select your provider:
- Apple (On-Device) — recommended, no key
- Anthropic for Claude
- OpenAI for ChatGPT
- Local for Ollama
- Custom API for any other OpenAI-compatible service
- Paste your API key (cloud providers only)
- Leave the model on its default, or tap Use custom model ID… to enter a provider-specific model name
- Click Save Key if you entered an API key
Tap the blue ? on the AI Coach preferences page to open Installation & Setup in the manual.
Step 3: Ask Your First Question (Immediate)#
Click + New Conversation and type anything:
- "I'm new to yKey Pro. What should I set up first?"
- "How do I create a shortcut that types my email signature when I press Control+Option+E?"
- "I want to automate my morning routine — open Safari, Mail, and Slack, and arrange them on screen"
- "What's MCP and should I care about it?"
- "My hotkey ⌃⌥R doesn't work. Help!"
The coach will answer immediately with specific, step-by-step instructions. It's like having a yKey expert sitting next to you — except this one has read the entire manual, never forgets anything, and is available 24/7.
What This Costs#
Your yKey license and an AI provider account are separate purchases. Cloud API costs vary with the provider, model, conversation length and tool use. Check the provider’s current billing page, set a spending limit where available, and review usage after a short test. A consumer chat subscription may not include API use.
Apple on-device and local Ollama requests do not incur cloud API charges. Local models still need a compatible Mac, storage and setup. Choose the model that works for your task; no provider can guarantee a correct answer.
You May Never Need to Read the Rest of This Manual#
Seriously. The coach knows everything in this manual — all 31 action types, all trigger types, all the settings, the troubleshooting steps, the MCP setup, the Bridge Packs, everything. If you have a question, just ask the coach. It will give you a faster, more personalized answer than searching through chapters.
The rest of this manual exists for people who prefer reading, for reference, and as the knowledge base that powers the coach itself.
4. Permissions & Security#
yKey Pro needs certain macOS permissions to automate your computer. This chapter explains what each permission does, why it's needed, and how to grant it.
Accessibility Permission (Required)#
What it does: Allows yKey Pro to simulate keyboard input, mouse clicks, read UI elements in other applications, and intercept global hotkeys.
Why it's required: macOS prevents any application from controlling other applications unless the user explicitly grants Accessibility access. This is a security feature — it means no app can secretly control your Mac without your knowledge.
How to grant it:
- Open System Settings > Privacy & Security > Accessibility
- Click the lock icon and authenticate if needed
- Click the + button
- Navigate to
/Applications/yKey Pro.appand add it - Ensure the toggle next to yKey Pro is ON
Without this permission: Most yKey Pro features will not work. Hotkeys will not be intercepted, text cannot be typed into other apps, buttons cannot be clicked, and menus cannot be activated.
Automation Permission (Recommended)#
What it does: Allows yKey Pro to send AppleScript commands to other applications.
Why it's needed: Actions like "tell application Finder to..." require Apple Events permission. macOS will prompt you the first time yKey Pro tries to control each application.
How to grant it:
- macOS will show a dialog: "yKey Pro wants to control [App Name]"
- Click OK to allow
- To manage later: System Settings > Privacy & Security > Automation
Microphone Permission (For Speech)#
What it does: Allows yKey Pro to listen through your Mac's microphone for voice commands and speech-to-text.
Why it's needed: The Speech view and the listen MCP tool need microphone access to transcribe your voice. Without it, push-to-talk and the hotkey speech toggle will not function.
How to grant it:
- yKey Pro will prompt you automatically the first time you use the Speech feature — click OK
- To manage later: System Settings > Privacy & Security > Microphone — ensure yKey Pro is toggled ON
Speech Recognition Permission (For Speech)#
What it does: Allows yKey Pro to use Apple's on-device speech recognition engine to convert your voice to text.
Why it's needed: The Speech view uses SFSpeechRecognizer for real-time transcription. This is a separate permission from Microphone access.
How to grant it:
- yKey Pro will prompt you automatically — click OK
- To manage later: System Settings > Privacy & Security > Speech Recognition — ensure yKey Pro is toggled ON
Screen Recording Permission (For MCP/AI)#
What it does: Allows yKey Pro's MCP server to take screenshots of your screen.
Why it's needed: When an AI assistant uses yKey Pro's MCP tools, it needs to see your screen to understand what's happening. Screenshots need Screen Recording permission. Accessibility-tree reading uses Accessibility permission; it does not require Screen Recording just to read labels and controls.
How to grant it:
- Open System Settings > Privacy & Security > Screen Recording
- Add yKey Pro and toggle it ON
Full Disk Access (Optional)#
What it does: Allows File Operation actions to access files in protected locations (Desktop, Documents, Downloads when using App Store version).
Why it's needed: Only needed if you use File Operation actions on files in sandboxed locations, or if you use the App Store version (which runs in a sandbox).
Important Security Warnings#
Warning — Accessibility Permission is Powerful Any application with Accessibility access can read what's on your screen, simulate keyboard input, and click buttons in any application. Only grant this permission to applications you trust. yKey Pro uses this power solely to execute the shortcuts you configure.
Warning — MCP Gives AI Full Control When you enable the MCP server and connect an AI assistant, that AI can see your screen, type text, click buttons, open applications, and run shell commands. This is by design — it's what makes AI-powered automation possible. However:
- Never leave MCP running unattended with an AI connected if you have sensitive information on screen
- Review what the AI is doing — watch your screen as it works
- External MCP uses local standard input/output. An AI client may send results to its cloud provider; local transport is not a privacy guarantee.
- Stop Engine stops yKey triggers. Disconnect a separately running MCP server in its client to stop its independent tools.
- Quitting yKey Pro stops the app bridge; external-server screen and shell tools may remain available until that server is stopped.
Warning — Shell Command and AppleScript Actions These actions can run arbitrary code on your Mac. Only use scripts you understand and trust. Never import shortcuts from untrusted sources without reviewing their actions first.
Verifying Permissions#
To check that all permissions are correctly configured:
- Open yKey Pro's editor
- Create a test shortcut with a "Type Text" action
- Assign a hotkey trigger
- Switch to any text editor (TextEdit, Notes, etc.)
- Press your hotkey — if text appears, Accessibility is working
- If nothing happens, revisit the Accessibility permission steps above
5. Quick Start Guide#
Your First Shortcut in 60 Seconds#
There is no timer. Take the time you need to find each control. You are teaching the Mac one tiny job, then giving that job a button.
Use a new, empty TextEdit document for this lesson. No API key, AI account or external server is needed. If your evaluation has ended, you can try the shortcut in this session, but it will not be saved without a license.
- Click the ⚡ icon in the menu bar → "Open Editor..."
- Choose Shortcuts in the workspace selector above the list
- Click the + button at the bottom of the shortcut list
- Name it "Hello World"
- In the Commands section, click + to add a command
- In the command picker, select Type Text and click Add
- In the editor dialog, type:
Hello from yKey Pro!and click Save - In the Launchers section, click the dropdown menu to add a launcher
- Select Hotkey…, click Record, press your desired key combination (e.g., ⌃⌥H), and click Add
- Click Save & Activate to save changes and restart the engine
Now switch to the empty TextEdit document, click inside it, and press ⌃⌥H. The expected result is one line: Hello from yKey Pro! Undo removes the inserted text.
If nothing appears, check that the engine is running, the shortcut is active, and Accessibility is enabled for this exact installed app. If the wrong application receives text, bring TextEdit forward before pressing the hotkey. Do not test a typing shortcut in a password field, terminal or live message composer.
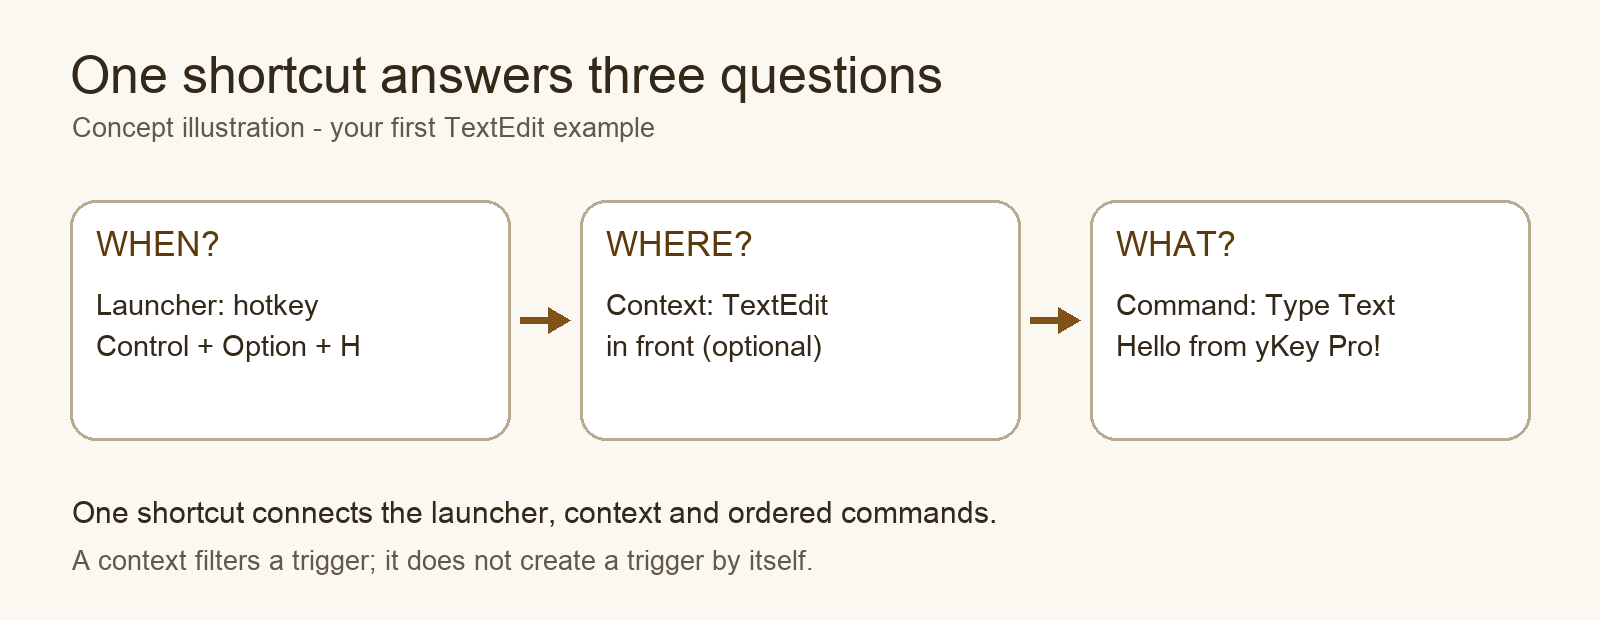
Try one change: Replace the greeting with “My first useful shortcut.” Run it again. Then add a TextEdit context and confirm that the hotkey only works while TextEdit is in front. Remove that context if you want a universal text snippet.
Three small automation challenges#
Pick a task you recognize. A useful automation is often only two or three steps.
| Start here | Build it | Check it | Make it your own |
|---|---|---|---|
| My project header — a first experiment | Duplicate your greeting shortcut. Type a title and three lines: Question, What I tried, What I learned. | In an empty TextEdit document, one hotkey should insert one header. Undo should remove it. | Make a reading log, game-design notebook or science-project page. |
| My daily workspace — for work or study | Add Application commands for two apps you actually use. Run them manually first. | Both apps should open. Run it a second time and check that the result still makes sense. | Add a Window command only after the launch steps work. |
| My reusable routine — a deeper experiment | Add a context, a harmless Conditional and a completion message to a tested shortcut. | Try once when the condition is true, then once when it is false. | Read the advanced workflow workshop in Appendix B before adding schedules, scripts or network requests. |
Before you add another step, be able to say what the current step should do. If an experiment misbehaves, turn off its Active checkbox and test the commands individually. You can stop automatic triggers from the ⚡ menu with Stop Engine. Undo belongs to the target app; it is not a universal reversal for every automation.
Understanding the Hierarchy#
Shortcut
├── Commands (what to do — one or more steps, executed in order)
├── Launchers (when to do it — hotkey, schedule, app event, etc.)
└── Contexts (where to do it — which apps, which conditions)
A Shortcut ties everything together. It says: "When this launcher fires, and these conditions are met, run these commands in order."
Terminology note: In the yKey editor, actions are called Commands and triggers are called Launchers. This matches the terminology used in the classic yKey application. Throughout this manual, we use both terms — "commands" and "actions" are interchangeable, as are "launchers" and "triggers."
Key concepts:
- Commands are reusable — the same command can appear in multiple shortcuts
- Launchers are independent — a shortcut can have multiple launchers (e.g., a hotkey AND a schedule)
- Contexts are optional — without a context, the shortcut works everywhere
- Saving uses JSON — during evaluation or with a qualifying license, your shortcut library is human-readable and portable. After evaluation, edits are temporary until you activate a license.
Five More Examples to Try#
Example 2: Open your daily apps Create a shortcut with three Application actions: Launch Safari, Launch Mail, Launch Calendar. Assign a hotkey like ⌃⌥D. Press it when you sit down to work.
Example 3: Window layout Create a shortcut with two Window actions: Move Safari to the left half of the screen, move your editor to the right half. Assign ⌃⌥W.
Example 4: Meeting mode Create a shortcut that: (1) launches Zoom, (2) enables Focus Mode (Do Not Disturb), (3) moves your chat app to a secondary display. Trigger it with ⌃⌥M.
Example 5: Text snippet Create a shortcut with a Type Text action containing your email signature. Assign ⌃⌥S. Use it in any app.
Example 6: End of day Create a shortcut that: (1) runs a Shell Command to commit your git changes, (2) quits your development apps, (3) disables Focus Mode, (4) plays a sound. Trigger it with ⌃⌥Q.
Setup Guides#
For AI Coach: When a user asks how to set up, configure, or get started with a feature, prefer these short guides over inventing steps. Each guide is the authoritative quick path for humans.
Set Up Verbal Mac Guide
Verbal Mac Guide explains controls in any app from the menu bar — no editor window required. Microphone is not required for hover-and-hear explanations.
- Grant Accessibility — yKey menu → Grant Accessibility… → enable yKey Pro in System Settings → Privacy & Security → Accessibility.
- Show Live Guide Overlay — yKey menu → Show Live Guide Overlay (orange ring under the pointer).
- Choose how to hear explanations:
- Speak Under Pointer — pause ~1 second on a control to hear it aloud.
- Explain via yKey Hotkey (⌃⌥E) — point and press Control–Option–E once.
- Optional: talk back to the coach — set up Speech Input (Microphone + Speech Recognition) for push-to-talk or Voice Wake.
60-second demo script: Open TextEdit → enable overlay → hover a toolbar button → hear the explanation → press ⌃⌥E on another button → ask the AI Coach "set up verbal mac guide" if anything is missing.
Mac Guide Agent (Read-Only Peek)
- Open Preferences → AI Coach → enable Look at the front app before answering.
- Point at a control in another app (overlay recommended).
- Ask the coach "What is this?" — the reply includes a Mac Guide looked at your screen card with the pointed app’s UI tree.
Read-only peek, clicking, typing and menu-action experiments remain available after the evaluation ends. macOS permissions and MCP approval rules still apply. New shortcut edits are not saved after evaluation without a license.
Set Up Speech
yKey Pro includes built-in Speech (speech-to-text, text-to-speech, push-to-talk, and a system-wide listen hotkey). Do not tell users to use third-party speech apps instead.
- Open the Speech view — In the editor sidebar, click Speech (waveform icon).
- Grant permissions — The Speech view top bar shows three indicators (green = OK, orange = needed). Click Allow or approve macOS prompts for:
- Microphone (Privacy & Security → Microphone)
- Speech Recognition (Privacy & Security → Speech Recognition)
- Accessibility (Privacy & Security → Accessibility — required for the system-wide hotkey)
- Test listening — Press and hold Hold to talk (turns red while listening). Release to transcribe.
- Optional: system-wide hotkey — In the Speech view, turn the hotkey switch ON (default ⌃⌥Space). Tap once to start listening, tap again to stop. This is a toggle, not hold-to-talk.
- Tune settings (optional) — Open Preferences → Speech (menu bar ⚡ → Preferences) to choose STT provider (Apple default, or Whisper for offline), TTS voice, speech rate, Voice Wake, and hotkey presets.
Tip: After granting Accessibility, restart yKey Pro if the hotkey still does not work.
See Chapter 19 — Speech & Voice Control for full details.
Set Up AI Coach
- Open Preferences → AI Coach (menu bar ⚡ → Preferences).
- Select an available AI provider. Apple on-device AI needs a supported Mac and macOS version; cloud providers need their own API credentials. Choose the model shown in your provider settings.
- Open the AI Coach tab in the editor sidebar (or ask from the Speech view).
- Ask plain-language questions — e.g. "How do I create a shortcut?" or "What hotkey should I use for Safari?"
See Three Steps to Your AI Coach and Chapter 23 — Getting Help.
Set Up Teach
- Open Teach in the editor sidebar.
- Click Start Recording.
- Switch to another app and perform the task you want to automate.
- Return to yKey and click Stop Recording.
- Click Analyze & Suggest Shortcut — AI proposes a shortcut from your actions.
Requires yKey Pro + MCP tier or higher for AI analysis.
Set Up Core Permissions (Automation)
Most yKey features need Accessibility (Privacy & Security → Accessibility). Speech also needs Microphone and Speech Recognition. MCP/AI screen tools may need Screen Recording.
- Open Preferences → Permissions to see status and open System Settings.
- Enable Accessibility first if shortcuts that click or type are not working.
- Click Save & Activate after changing shortcuts so the engine reloads.
See Chapter 4 — Permissions & Security.
6. The Editor Window#
The editor is your command center. It has a context sidebar on the left and a content area on the right, organized by tabs at the top.
Tab Bar#
The top of the editor has tabs for the main sections:
| Tab | What It Shows |
|---|---|
| Shortcuts | Your automation workflows — the central objects |
| Menus | Custom menu bar items that trigger shortcuts |
| Palettes | Floating button panels on your desktop |
Context Sidebar#
The left sidebar shows your Contexts — activation conditions that determine where shortcuts are active.
| Item | Behavior |
|---|---|
| Show All Items | Single-click to display all shortcuts regardless of context |
| Universal (all contexts) | Single-click shows all shortcuts. Double-click opens the universal context editor. |
| Application in Front (n) | Disclosure group showing contexts for specific apps in the foreground |
| System | System-level sections: Activity Log, AI Coach |
Tip: Click any context in the sidebar to filter the shortcut list to only those shortcuts assigned to that context. Click "Show All Items" or "Universal (all contexts)" to see everything.
Sidebar Bottom Sections#
| Section | What It Shows |
|---|---|
| Activity Log | Execution history — see what ran, when, and whether it succeeded |
| AI Coach | Built-in AI assistant that knows yKey Pro. Has a ⚙ icon for quick access to Preferences. |
| Speech | Voice interface — talk to your Mac and hear it talk back (see Speech & Voice Control) |
| AI Canvas | Visual workspace where AI can display live content |
| Security | MCP tool permissions and audit log |
| License | Your current tier and license management |
Toolbar#
| Button | Action |
|---|---|
| Create (+) | Create a new shortcut |
| Delete (−) | Delete selected shortcuts |
| Edit (pencil) | Edit the selected shortcut |
| Duplicate | Duplicate the selected shortcut(s) |
| Save & Activate | Save all changes AND restart the engine so changes take effect immediately |
| Import | Import .ykex files — drag them onto the list, or use File > Import |
| Export Selected | Export the selected shortcut(s) as a .ykex file |
| ? | Open help documentation |
Shortcut List#
The shortcut list displays your shortcuts in a table with sortable columns:
| Column | Content | Sort |
|---|---|---|
| Name | Shortcut name with app icon | Click header to sort A→Z or Z→A |
| Launchers | Hotkey display (e.g., ⌥S (↓)) with modifier symbols | Click header to sort |
| Commands | Number of commands (e.g., "2 commands") | Click header to sort |
Interactions:
- Single-click a shortcut to view its detail below
- Multi-select with ⌘-click or ⇧-click for batch operations
- Right-click for context menu: Create, Edit, Duplicate, Export, Test, Delete
- Drag out one or more shortcuts to export them as .ykex files
- Drag in .ykex files to import shortcuts
Search#
The search bar at the top of the shortcut list filters items by name. Type to filter — the list updates instantly.
Drag and Drop#
- Reorder commands in the shortcut detail view by dragging them
- Export shortcuts by dragging them out of the list to Finder or another app
- Import shortcuts by dragging .ykex files into the shortcut list
7. Shortcuts#
A shortcut is the central unit in yKey Pro. It's the container that holds commands (what to do), launchers (when to do it), and contexts (where to do it).
Properties#
- Name: A descriptive name (shown in lists, the menu bar, and the Activity Log)
- Active: Toggle ON/OFF to enable/disable without deleting. Inactive shortcuts are preserved but don't respond to launchers. When a hotkey triggers an inactive shortcut, it is logged to the Activity Log with a note that it was skipped.
- Commands: An ordered list of things to do. Commands execute top-to-bottom.
- Launchers: What causes the shortcut to run. Multiple launchers are supported (any one of them can fire the shortcut).
- Contexts: Optional conditions that must be met. If no context is set, the shortcut works everywhere.
Shortcut Detail View#
When you click a shortcut in the list, the detail view appears below. It shows four sections:
Commands Table
Commands execute in order, top to bottom. This is the core of yKey Pro's power — you can chain any combination of the 31 command types into a single workflow.
The commands table shows columns for:
| Column | Content |
|---|---|
| Icon + Name | The command type icon and name |
| Repeat | How many times to repeat this command (default: 1) |
| Pause | Seconds to pause between repetitions |
| Success | What happens on success: Continue, Report, or Stop |
| Failure | What happens on failure: Continue, Stop, or Ask User |
Interactions:
- Double-click a command row to open its editor dialog
- Right-click for context menu: Edit…, Test, Delete
- Click the Repeat/Pause/Success/Failure area to open the Repetition and Result dialog
- + button to add a new command (opens the command picker)
- − button to remove the selected command
Each command reference includes fine-grained control:
- Repeat count: Run the command multiple times (e.g., press Down Arrow 10 times)
- Repeat delay: Pause between repetitions (e.g., 0.5 seconds between each press)
- On success: What to do when the command succeeds — Continue (run next command), Report (log it), or Stop (end the shortcut)
- On failure: What to do when the command fails — Continue (ignore the error), Stop (end the shortcut), or Ask User (show a dialog)
- Timeout: Maximum seconds to wait for the command to complete before treating it as failed
Launchers Table
Lists all launchers (triggers) for this shortcut. Hotkey launchers show the key combination with modifier symbols (e.g., ⌥S (↓) for Option+S on key down).
Interactions:
- Double-click a launcher to edit it
- Right-click for context menu: Edit…, Delete
- Dropdown menu to add a new launcher (hierarchical menu matching old yKey's launcher types)
Contexts Table
Lists all contexts assigned to this shortcut.
Repetition Section
At the bottom, a shortcut-level Repetition section controls how the entire shortcut repeats:
- Repeat: Number of times to repeat (0 = no repeat, or "until stopped")
- Pause: Seconds between each full repetition
Creating a Shortcut#
- Choose Shortcuts in the workspace selector
- Click + (Create) in the toolbar
- Give it a descriptive name
- Add one or more commands using the + button in the Commands section
- Add at least one launcher using the dropdown menu in the Launchers section
- Optionally add contexts to restrict where it runs
- Click Save & Activate to save and restart the engine
Tips for Organizing Shortcuts#
- Use descriptive names: "Open Morning Apps" is better than "Shortcut 1"
- Group related shortcuts by naming convention: "Photoshop: Resize", "Photoshop: Export"
- Keep each shortcut focused on one task — it's better to have many small shortcuts than one giant one
- Use the search bar to quickly find shortcuts in large collections
- Use the sortable column headers to organize by name, launcher, or number of commands
8. Commands — The 30 Things yKey Can Do#
The current beta has 31 command types, including Speech. This chapter retains its established name; Chapter 19 teaches speech in detail. Test commands that type, click or change files with demonstration data before attaching automatic launchers.
Commands (also called "actions" in technical documentation) are the building blocks of automation. yKey Pro includes 31 command types organized into categories. Each command type is implemented as a plugin, making the system extensible.
Terminology note: In the yKey editor UI, these are called "Commands." In the underlying code and MCP tools, they are called "Actions." The terms are interchangeable.
Text & Keyboard#
Type Text
Types text character by character as if you were sitting at the keyboard. The text is sent to whatever application is currently in the foreground.
Parameters:
- Text: The text to type. Can be multiple lines. Supports all Unicode characters.
- Delay: Pause between keystrokes (default: 0.01 seconds). Increase this if the target application drops characters.
- Use paste: Instead of simulating individual keystrokes, this copies the text to the clipboard and sends ⌘V. Much faster for large blocks of text and guarantees Unicode accuracy, but briefly overwrites the clipboard.
Use cases:
- Email templates — type your standard reply with one hotkey
- Code snippets — type boilerplate code instantly
- Form filling — fill out repetitive web forms
- Text expansion — type a long phrase from a short trigger
- Signatures — consistent email or document signatures
Tips:
- If special characters (é, ñ, 日本語) aren't typing correctly, enable "Use paste"
- For very long text blocks (>500 characters), "Use paste" is significantly faster
- You can include newlines in the text — they'll be typed as Return keypresses
Key Shortcut
Simulates pressing a keyboard shortcut — exactly as if you pressed the keys yourself.
Parameters:
- Key: The key to press. Click the Record button and press the key to capture it.
- Modifiers: Command (⌘), Shift (⇧), Option (⌥), Control (⌃) — any combination
- Key down/up: By default, sends both the key-down and key-up events. You can choose to send only one — useful for games or applications that distinguish between press and release.
Use cases:
- Triggering menu commands that have no built-in shortcut
- Chaining multiple keyboard shortcuts: Select All (⌘A), Copy (⌘C), switch apps (⌘Tab), Paste (⌘V)
- Sending keyboard shortcuts to applications that are hard to automate otherwise
- Pressing function keys (F1–F20) or media keys
Tips:
- If you need to press a key sequence with a delay, use separate Key Shortcut actions with a Pause action between them
- Double-check your recorded key by looking at the displayed combination — some international keyboards map differently
Scripting#
AppleScript
Executes AppleScript code — Apple's built-in automation language that can control any scriptable application.
Parameters:
- Script: Inline AppleScript code entered directly in the editor
- Script file: Path to a
.scptor.applescriptfile on disk (alternative to inline)
Use cases:
- Controlling scriptable applications (Finder, Safari, Mail, iTunes, Pages, Numbers, etc.)
- Complex multi-app workflows: "Get selected text from Safari, process it, paste into Pages"
- Accessing macOS features that aren't available through keyboard shortcuts
- Querying application state: "What's the current URL in Safari?"
Example script:
tell application "Finder"
    set desktop picture to POSIX file "/Library/Desktop Pictures/Sequoia.heic"
end tell
Tips:
- Test your script in Script Editor.app first before adding it to yKey Pro
- Use
Script filefor long or frequently-edited scripts - AppleScript can be slow for complex operations — if speed matters, consider Shell Command with
osascript
Shell Command
Runs a shell command via /bin/zsh — the default macOS shell.
Parameters:
- Command: The shell command to execute. Can be a single command or a multi-line script.
- Script file: Path to a
.sh,.py,.rb, or any executable script file
Use cases:
- Running command-line tools (git, npm, brew, ffmpeg, etc.)
- File processing (batch rename, convert formats, compress)
- System administration (network diagnostics, process management)
- Calling Python, Ruby, or any scripting language
- Automating build processes
Example commands:
# Take a screenshot to Desktop
screencapture ~/Desktop/screenshot-$(date +%Y%m%d-%H%M%S).png

# Git quick commit
cd ~/Projects/myapp && git add . && git commit -m "Quick save"

# Convert clipboard text to uppercase
pbpaste | tr '[:lower:]' '[:upper:]' | pbcopy
Tips:
- The command runs with your user permissions, not root
- Use full paths for commands if in doubt:
/usr/bin/gitinstead ofgit - Standard output and standard error are captured in the Activity Log
- Long-running commands will block the action chain — use
&to background if needed
JavaScript (New in 3.0.0)
Runs JavaScript code using macOS's built-in JavaScriptCore engine — no browser required.
Parameters:
- Script: JavaScript code
Available globals:
clipboard— the current clipboard text (string)env— a limited allowlist of environment variables (object), not unrestricted access to the app process environmentlog(message)— sends output to the Activity Log
Use cases:
- Data transformation (parse JSON, manipulate strings, calculate values)
- Text processing without needing a full scripting language
- Quick regex operations
- Formatting data from the clipboard
Example scripts:
// Pretty-print JSON from clipboard
var json = JSON.parse(clipboard);
log(JSON.stringify(json, null, 2));

// Convert CSV to tab-separated
var result = clipboard.split(',').join('\t');
log(result);

// Generate a random password
var chars = 'ABCDEFGHJKMNPQRSTUVWXYZabcdefghjkmnpqrstuvwxyz23456789!@#$%';
var password = '';
for (var i = 0; i < 16; i++) {
    password += chars.charAt(Math.floor(Math.random() * chars.length));
}
log(password);
Applications & Files#
Application
Controls applications — launch, quit, hide, activate, or toggle.
Parameters:
- Application: Path to the application (e.g.,
/Applications/Safari.app). Click Browse to select. - Action: Launch, Quit, Force Quit, Hide, Activate (bring to front), or Toggle (launch if not running, activate if running)
Use cases:
- Starting your work environment — launch all your daily apps with one hotkey
- Closing distracting apps — quit social media apps when focus time starts
- Toggling app visibility — press a hotkey to show/hide Slack
- Force-quitting unresponsive apps without reaching for the Force Quit dialog
Document
Opens a document, optionally with a specific application.
Parameters:
- File: Path to the document
- Open with: Application to open it with (optional — uses the default app if not specified)
Use cases:
- Opening your current project file instantly
- Opening the same document in different apps (e.g., open a .psd in Preview instead of Photoshop)
- Quick access to frequently-used templates
Folder
Opens or creates a folder in Finder.
Parameters:
- Action: Open folder (in Finder) or Create folder
- Path: The folder path
Finder Window
Navigates an existing Finder window to a specific location.
Parameters:
- Path: Destination folder
- New window: Whether to open in a new Finder window or navigate the current one
File Operation (New in 3.0.0)
Performs file system operations — copy, move, rename, compress, and more.
Parameters:
- Operation: Copy, Move, Rename, Delete (Trash), Create Directory, Compress (ZIP), Decompress, Create Symlink, Get File Info
- Source: The source file or folder path
- Destination: The destination path (for copy, move, rename)
Use cases:
- Batch file management — move downloaded files to organized folders
- Backup workflows — copy project folders to an external drive
- Screenshot organization — move screenshots from Desktop to a dated folder
- Automated cleanup — delete temp files on a schedule
UI & Window Control#
Interface
Interacts with UI elements in other applications via the macOS Accessibility API. This is one of the most powerful action types — it can click buttons, read text fields, and interact with any visible UI element.
Parameters:
- Action: Click element, Set value, Read value, Press button, Wait for element
- Element: Identified by role (e.g., AXButton, AXTextField), title (the button's label), or identifier
- Application: Target application (or frontmost app)
Use cases:
- Clicking buttons in apps that don't have keyboard shortcuts
- Automating dialog boxes — click "Save" or "Don't Save" automatically
- Reading values from UI elements — get the current value of a slider or text field
- Waiting for a dialog to appear before continuing
Tips:
- Use the MCP
read_screentool to explore an app's accessibility tree and find element identifiers - Not all apps expose all their UI through accessibility — some custom-drawn interfaces may not be automatable
- Element identifiers can change between app versions — use title matching when possible
Menu
Activates a menu bar item by its full path — as if you clicked through the menus manually.
Parameters:
- Application: Target application
- Menu path: The menu hierarchy, e.g., "File → Export → Export as PDF..."
Use cases:
- Accessing deeply nested menu commands with one hotkey
- Creating shortcuts for menu items the app doesn't assign shortcuts to
- Automating complex multi-step menu operations
Mouse
Simulates mouse events — clicks, moves, drags, and scrolls.
Parameters:
- Action: Click, Right Click, Double Click, Move, Drag, Scroll
- Position: X and Y screen coordinates
- Relative: Move relative to the current cursor position instead of absolute coordinates
- Button: Left or Right mouse button
Use cases:
- Clicking specific screen locations — toolbar buttons, dialog options
- Automated testing — click through a sequence of UI elements
- Drawing applications — automate brush strokes or selections
- Games — automate repetitive clicking
Tips:
- Screen coordinates are in points (not pixels) and (0,0) is the top-left corner
- Use relative positioning when the target moves (e.g., within a window that might be at different positions)
- Add Pause actions between mouse actions to give apps time to respond
Window
Manipulates application windows — move, resize, minimize, and more.
Parameters:
- Application: Target application (or frontmost app if not specified)
- Action: Move, Resize, Minimize, Zoom, Close, Center, Fullscreen
- Position/Size: X, Y, Width, Height values
Use cases:
- Window layout management — arrange your apps in a consistent layout
- Presentation setup — move apps to specific positions before a meeting
- Multi-monitor management — send windows to specific displays
- Quick tiling — left half, right half, quarters
System#
System
Performs system-level actions.
Actions available:
- Sleep: Put the Mac to sleep
- Restart: Restart the Mac
- Shut Down: Shut down the Mac
- Log Out: Log out of the current user
- Screen Saver: Start the screen saver
- Eject Media: Eject removable media
- Empty Trash: Empty the Trash
Tips:
- Sleep, Restart, and Shut Down will interrupt any running actions — use them as the last action in a chain
- You'll be prompted to confirm for destructive actions (Restart, Shut Down) unless you've configured otherwise
Preference
Opens specific System Settings panes directly — skipping the navigation.
Parameters:
- Settings pane: Choose from General, Accessibility, Network, Displays, Sound, Bluetooth, Wi-Fi, Privacy & Security, and more
Use cases:
- Quick access to deeply-nested settings — no more clicking through 4 levels of System Settings
- IT support — create a shortcut that opens the exact settings pane you need
Triggers print operations.
Actions:
- Print current document: Simulates ⌘P
- Open Printer Settings: Opens System Settings > Printers & Scanners
Sound
Plays a sound — useful for audio feedback when shortcuts complete.
Parameters:
- System sound: Choose from built-in macOS sounds (Basso, Blow, Bottle, Frog, Funk, Glass, Hero, Morse, Ping, Pop, Purr, Sosumi, Submarine, Tink)
- Custom file: Path to a
.aiff,.mp3, or.wavfile
Use cases:
- Confirmation beeps when long-running shortcuts complete
- Alert sounds for error conditions
- Fun sounds for team environments (Slack message arrives → play sound)
- Alarm/reminder sounds for time-based triggers
Communication#
Message
Displays messages to the user or composes emails.
Parameters:
- Type: Alert Dialog, Notification, or Email
- Title/Message: Content to display
- Buttons: Customize button labels for alert dialogs (default: OK)
- To/Subject/Body: Email fields (for email type)
Use cases:
- Confirmation dialogs after important operations: "Backup complete. 47 files copied."
- macOS notification center alerts: "Meeting in 5 minutes"
- Quick email composition: pre-fill To, Subject, and Body from a template
URL
Opens a URL in the default browser.
Parameters:
- URL: The web address to open. Can include query parameters.
Use cases:
- Opening frequently-visited websites with a hotkey
- Triggering webhooks (Zapier, IFTTT, Make, n8n)
- Launching web applications
- Opening specific pages in web-based tools (Jira tickets, GitHub repos)
Clipboard#
Clipboard
Performs clipboard operations.
Actions:
- Copy: Sends ⌘C to the frontmost app
- Paste: Sends ⌘V to the frontmost app
- Clear: Clears the clipboard
- Append: Adds text to the existing clipboard content (useful for collecting text)
- Clipboard History: Shows the clipboard history
Network#
Network / Mount
Changes a Mac network location or connects to a network volume. Choose one of three operations:
- Switch Network Location: Activates the selected macOS network location. yKey reads the current list from the Mac, so the editor offers the same names shown in Network settings.
- Choose Network Location When Run: Opens a small menu beside the pointer. The current location has a checkmark; select another to switch immediately.
- Mount Network Volume: Connects to an SMB, AFP, NFS, HTTP, or HTTPS file server. Enter a server such as
smb://files.example.comand, optionally, a share/folder, user name, and password. Passwords are stored in the macOS Keychain rather than the yKey data file.
Use cases:
- Switching between home and office network configurations
- Activating a VPN-friendly network profile
- Switching DNS settings
- Choosing a location without opening System Settings
- Mounting an office file server or home NAS
Flow Control#
Pause
Pauses execution for a specified duration. Essential for giving applications time to respond between actions.
Parameters:
- Duration: Seconds to wait (supports decimals, e.g., 0.5)
- Random: Use a random duration between a minimum and maximum value
Use cases:
- Waiting for an application to launch before sending it commands
- Adding human-like delays to avoid overwhelming an application
- Waiting for a dialog box to appear
- Rate-limiting API calls in a Web API action chain
Tips:
- Start with short pauses (0.5 seconds) and increase if actions are failing
- Different apps have different response times — Finder is fast, Photoshop may need 1-2 seconds
- For waiting on specific UI elements, prefer the Interface action's "Wait for element" over a fixed pause
Conditional (New in 3.0.0)
Adds a simple guard to an action chain. When the condition is true, the next active action runs. When it is false, yKey skips exactly the next active action and then continues. This makes a three-step pattern easy: Conditional → action to run only when true → whatever comes next.
Conditions available:
- Clipboard contains text: Check if the clipboard contains a specific string
- Clipboard matches regex: Check if the clipboard matches a regular expression
- File exists: Check if a file or folder exists at a path
- App is running: Check an application name or bundle identifier
- Environment variable equals: Check the value of an environment variable
- Time is between: Check if the current time is within a 24-hour range (e.g., 9–17). Ranges can cross midnight, such as 22–6.
- Day of week: Check if today is a specific day (Monday through Sunday)
- Previous result contains: Check text returned by the previous action
Parameters:
- Condition type: One of the above
- Value: The value to check against
- Negate: Invert the condition (NOT) — e.g., "file does NOT exist"
Use cases:
- Only run a backup if the external drive is connected (file exists check)
- Different behavior for work hours vs. evening (time check)
- Skip actions if an app is already running (app running check)
- Process clipboard only if it contains a URL (regex check)
Integration (New in 3.0.0)#
Shortcuts.app
Runs shortcuts from Apple's Shortcuts app — bridging yKey Pro with Apple's own automation framework.
Parameters:
- Shortcut name: The exact name of the Shortcuts.app shortcut
- Input: Optional text input to pass to the shortcut
Use cases:
- Triggering HomeKit scenes from a hotkey (via a Shortcuts shortcut)
- Running Shortcuts that access Apple-only features (Focus modes, Reminders, Messages)
- Combining yKey Pro's keyboard automation with Shortcuts' app integration
- Running shortcuts that you've shared with others
Web API (New in 3.0.0)
Makes HTTP requests to any URL — call REST APIs, trigger webhooks, post to Slack, and more.
Parameters:
- URL: The endpoint URL
- Method: GET, POST, PUT, PATCH, DELETE
- Body: Request body (JSON format)
- Headers: Custom HTTP headers (JSON format, e.g.,
{"Authorization": "Bearer token123"}) - Timeout: Request timeout in seconds (default: 30)
- Put result: Pass the response to the next command, copy it, type it into the front app, show it in an alert, record it in the Activity Log, or discard it
Use {{clipboard}} in the URL, headers, or body to insert the current Clipboard. Use {{previousResult}} to insert text returned by the preceding action. Header text must be a JSON object whose names and values are strings.
Use cases:
- Triggering Zapier/IFTTT/Make webhooks from a hotkey
- Posting messages to Slack channels
- Calling internal APIs (start a build, deploy code, trigger CI/CD)
- Controlling smart home devices via their REST APIs
- Querying weather, stocks, or other data APIs
Example — Post to Slack:
URL: https://hooks.slack.com/services/YOUR/WEBHOOK/URL
Method: POST
Body: {"text": "Deployment started from yKey Pro"}
AI Action (New in 3.0.0)
Sends prompts to AI language models and captures the response. Turn any AI model into a hotkey-triggered tool.
Parameters:
- Provider: OpenAI, Anthropic, or Local (Ollama/LM Studio)
- API Key: Your API key (stored securely in the Keychain, never in plain text)
- Model: The provider's model name (for example,
gpt-4o-mini,claude-sonnet-4-6, orgemma3:4b) - System prompt: Instructions that set the AI's behavior (e.g., "You are a translator. Translate input from English to Spanish.")
- Prompt: The question or task. It can include
{{clipboard}}and{{previousResult}}. - Temperature: Creativity level (0 = focused/deterministic, 2 = creative/varied)
- Put result: Pass the answer to the next command, copy it, type it, show it, log it, or discard it
For a local Ollama model, the default endpoint is http://localhost:11434/api/chat. Local requests remain on your Mac; OpenAI and Anthropic requests are sent to the provider you select.
Use cases:
- Summarize clipboard content with ⌃⌥S → copies the summary to clipboard
- Translate selected text with ⌃⌥T → types the translation
- Generate a commit message from your git diff with a hotkey
- Explain code that's on the clipboard
- Proofread and fix grammar in selected text
Example setup — Translate clipboard:
Provider: Anthropic
Model: claude-sonnet-4-6
System prompt: "Translate the following text to Spanish. Return only the translation, nothing else."
Prompt: {{clipboard}}
Focus Mode (New in 3.0.0)
Controls macOS Focus modes (Do Not Disturb, Work, Personal, etc.).
Actions:
- Toggle Do Not Disturb: Switch DND on/off
- Enable DND: Turn on Do Not Disturb
- Disable DND: Turn off Do Not Disturb
- Set Focus: Activate a specific Focus mode by name
Use cases:
- "Meeting mode" shortcut that enables DND
- "Focus time" that activates your Work focus
- "End of day" that disables all focus modes
Text Transform (New in 3.0.0)
Transforms text using regex, case changes, encoding, and other built-in operations. Operates on clipboard content or explicit input.
Transforms available:
- Regex find & replace: Full regular expression support
- Uppercase / Lowercase / Title Case: Case conversion
- Trim whitespace: Remove leading/trailing spaces
- Reverse: Reverse the text
- URL encode / decode: Percent-encoding for URLs
- Base64 encode / decode: Base64 conversion
- Count characters / words / lines: Text statistics
- Sort lines: Alphabetical line sorting
- Remove duplicate lines: Deduplicate
- Prettify JSON: Format JSON with indentation
- Regex extract: Extract matching groups from text
Use cases:
- Clean up pasted text — remove extra whitespace with one hotkey
- Convert variable names —
camelCasetosnake_caseand back - Format JSON from clipboard — prettify it instantly
- Extract data from text — pull all email addresses from clipboard content
yKey Control#
yKey
Controls the yKey Pro engine itself — meta-automation.
Actions:
- Toggle engine: Start or stop the engine
- Open editor: Open the editor window
- Pause engine: Temporarily pause (shortcuts stop firing, but state is preserved)
- Resume engine: Resume after a pause
- Run shortcut: Run another shortcut by name — enables shortcut-calling-shortcut patterns
Use cases:
- A "master switch" shortcut that starts a whole sequence of other shortcuts
- Temporarily disable all shortcuts (pause) during a presentation, then resume after
- Creating modular automation: a "Setup" shortcut calls "Arrange Windows", "Open Apps", and "Set Focus Mode" shortcuts
9. Launchers — What Starts a Shortcut#
Launchers (also called "triggers" in technical documentation) determine when a shortcut runs. A shortcut can have multiple launchers — any one of them can fire the shortcut. Launchers are independent objects that are attached to shortcuts.
Terminology note: In the yKey editor UI, these are called "Launchers." In the underlying code and older documentation, they are called "Triggers." The terms are interchangeable.
Adding a Launcher#
In the shortcut detail view, the Launchers section has a dropdown menu that matches the classic yKey's "Add Launcher" menu. This hierarchical menu organizes launcher types by category, making it easy to find the right trigger type. For complex launchers (like Date/Time or Hotkey), selecting the type opens a comprehensive configuration dialog.
Hotkey (All tiers)#
The most common trigger. Press a key combination anywhere on your Mac to run the shortcut.
Configuration:
- Click Record and press your desired key combination
- Supports all modifier combinations: ⌘ (Command), ⇧ (Shift), ⌥ (Option), ⌃ (Control)
- Supports function keys (F1–F20), arrow keys, and special keys
- Supports double-key sequences: press one key, then another within a timeout
- Release-only triggers: fire on key release instead of key press
- Auto-repeat: continue firing while the key is held down
Tips for choosing hotkeys:
- ⌃⌥ (Control+Option) is the safest prefix — it rarely conflicts with system or app shortcuts
- Hyper key (⌘⌃⌥⇧) is guaranteed to be unused by any application
- Avoid ⌘Q (Quit), ⌘W (Close), ⌘Tab (App Switcher), and other system-reserved combinations
- The hotkey display uses standard Mac notation: ⌘⇧⌥⌃
- If a hotkey doesn't fire, another app may be capturing it first — check for conflicts
Date/Time (Pro tier)#
Runs the shortcut on a schedule — daily, weekly, or monthly.
Configuration:
- Schedule type: Daily, Weekly, or Monthly
- Time: The time to run in HH:mm format (e.g., 09:00, 17:30)
- Days: For weekly — which days of the week. For monthly — which day of the month.
- Repeat: Run once at the scheduled time, repeat N times, or repeat indefinitely
- Repeat interval: Pause between repetitions (in seconds)
- Overdue handling: What to do if the scheduled time passes while the Mac is asleep:
- Skip: Don't run the missed execution
- Run: Run immediately when the Mac wakes up
- Ask: Show a dialog asking whether to run
Use cases:
- Daily standup reminder at 9:00 AM
- Weekly backup every Friday at 6:00 PM
- Monthly report generation on the 1st
- Hourly screenshot capture (repeat every 3600 seconds)
Application Event (Pro tier)#
Runs when an application is launched, quit, activated, or deactivated.
Configuration:
- Application: Path to the application to watch
- Event type: Launch, Terminate, Activate (brought to foreground), Deactivate (sent to background)
Use cases:
- Arrange windows when Xcode launches
- Start a timer when you activate Slack
- Clean up temp files when Photoshop quits
- Disable distracting shortcuts when a game launches
System Event (Pro tier)#
Runs on system-level events.
Events:
- Boot: When the Mac starts up (yKey Pro must be set to launch at login)
- Sleep: Just before the Mac goes to sleep
- Wake: When the Mac wakes from sleep
- Shutdown: Just before the Mac shuts down
Use cases:
- Run a sync script when the Mac wakes up
- Save all documents before sleep
- Start your morning routine at boot
- Commit unsaved work before shutdown
Network Change (Pro tier)#
Runs when network connectivity changes.
Events:
- Network Connected: Internet connectivity established
- Network Lost: Internet connectivity lost
Use cases:
- Connect to VPN when you get online
- Start sync when connected
- Pause downloads when disconnected
USB Device (Pro tier)#
Beta limitation: the editor and data model include this launcher, but the current engine has no verified USB-event dispatch path. Do not rely on it for unattended work in beta 5. Use a hotkey to test the same command chain instead. The settings below describe the stored launcher configuration.
Runs when a specific USB device is connected or disconnected.
Configuration:
- Device: Identified by vendor ID and product ID
Use cases:
- Open an audio app when your USB microphone is plugged in
- Start backup when an external drive is connected
- Launch a specific tool when a USB keyboard/controller is attached
Calendar Change (Pro tier)#
Beta limitation: this launcher has configuration UI, but the current engine has no verified calendar-change dispatch path. It is not a dependable automatic trigger in beta 5. Test the command sequence manually while this integration is completed.
Runs when calendar events change.
Events:
- Calendar changed: Any calendar modification
- To-Do changed: A reminder/to-do is created or modified
- Event changed: A calendar event is created, modified, or deleted
Use cases:
- Auto-join meetings when calendar events start
- Notify via Slack when a new event is added
- Export calendar changes to a log file
10. Contexts — Where Shortcuts Are Active#
Contexts make shortcuts conditional. Without a context, a shortcut works everywhere. With a context, it only works when specific conditions are met. This is incredibly powerful — you can assign the same hotkey to different actions in different applications.
Context Types#
| Type | When Active |
|---|---|
| Any App Activated | Always active (default — same as no context) |
| App Activated | Only when a specific app is in the foreground |
| App Deactivated | Only when a specific app is NOT in the foreground |
| App Running | When an app is running (even in background) |
| App Not Running | When an app is NOT running |
How Contexts Work#
Contexts are evaluated when a trigger fires. If the context conditions are not met, the shortcut is silently ignored.
The same hotkey, different apps: You can create multiple shortcuts with the same hotkey but different contexts:
- ⌃⌥R in Safari → Reload page (⌘R)
- ⌃⌥R in Terminal → Run last command (Up Arrow, Return)
- ⌃⌥R in Xcode → Build and run (⌘R)
Each shortcut has the same hotkey trigger but a different "App Activated" context.
The Context Sidebar#
Contexts are prominently displayed in the left sidebar of the editor window. The sidebar provides a natural way to filter your shortcut list:
| Sidebar Item | Single-Click | Double-Click |
|---|---|---|
| Show All Items | Shows all shortcuts | — |
| Universal (all contexts) | Shows all shortcuts | Opens the universal context editor |
| App-specific context | Filters shortcuts to that context | Opens the context editor |
Contexts are grouped by type using disclosure groups:
- Application in Front — contexts for specific apps when they are the foreground window
- Application Running — contexts for apps that are running (even in background)
- Application Not Running — contexts for when specific apps are not running
At the bottom of the context panel:
- + button: Add a new context
- − button: Delete the selected context
Right-click any context for a menu with: Edit, Export, Delete.
Creating a Context#
- Click the + button at the bottom of the context sidebar
- Choose the context type (e.g., "App in Front")
- Click Browse to select the application
- Name the context
- The context appears in the appropriate disclosure group
Alternatively, from a shortcut's detail view:
- In the Contexts section, click + to add a context reference
- Select an existing context or create a new one
Tips#
- Contexts are evaluated in real-time — switching apps immediately changes which shortcuts are active
- "App Running" is different from "App Activated" — an app can be running in the background without being in the foreground
- You can combine multiple contexts on a single shortcut — all conditions must be met
- If you're unsure why a shortcut isn't firing, check its contexts first — the Activity Log also reports when shortcuts are skipped due to context mismatch
- The sidebar gives you a quick overview of all your app-specific automation — click a context to see only the shortcuts relevant to that app
11. Custom Menus#
Custom menus are one of yKey Pro's most powerful features — they let you create your own menu bar icons that drop down to reveal your shortcuts, commands, and submenus. Each menu you create becomes a real macOS status bar item (just like the system clock or Wi-Fi icon), giving you one-click access to any automation.
How It Works#
When you create a menu in the editor and check "Show in menu bar", yKey Pro adds a real NSStatusItem to the macOS menu bar. The menu appears as its own icon/label, completely separate from yKey's main ⚡ bolt icon. You can have as many custom menus as you want — each one is independent.
What appears in each custom menu:
- All the shortcuts and commands you've added (with their app icons and hotkey labels)
- Separators and submenus for organization
- Built-in Speech controls — Start/Stop Listening and Voice Wake toggle
- System items — Open Editor, Open Manual, and Quit yKey Pro
This means every custom menu is a fully functional yKey control panel.
Creating a Menu#
- Click the Menus tab in the editor
- Click + to create a new menu
- Name it (this appears in the menu bar if "Show name in bar" is checked)
- Check "Show in menu bar" to make it appear as a status bar icon
- Add items using the + button — a hierarchical command picker lets you choose from all available command types
The Menu Editor#
The menu editor shows two main sections side by side:
Left side — Button Items: A table listing all items in the menu. Each item has a name and an associated command. Use + and − to add/remove items.
Right side — Configuration:
- Contexts: Which contexts this menu is active in
- Launchers: Additional triggers for showing/hiding the menu
- Menu Display: Configure the menu's appearance — icon display, key equivalent display, font size. Options include:
- Show in bar: Whether this menu appears as a menu bar icon
- Show image in bar: Display an icon in the menu bar (defaults to ⚡ bolt if none set)
- Show name in bar: Display the menu's name text in the menu bar
- Image is template: Use the icon as a template image (adapts to light/dark mode)
- Menu Item Display: Configure how items look — show icons, show key equivalents
Menu Items#
- Standard items: Click to run the associated shortcut or command
- Separators: Visual dividers between groups of items
- Submenus: Nested groupings for organization (other menus can appear as submenus)
Tips#
- Keep menu names short — they appear in the limited space of the menu bar
- Use submenus to organize large collections: "Dev Tools → Git Commit / Git Push / Build"
- Menu items show the associated hotkey (if any) for discoverability
- You can add any of the 22+ command types to a menu item using the hierarchical command picker
- Legacy users: Your old yKey menus are automatically imported, including the main lightning bolt menu. They'll appear in the menu bar just like they did in the old version
- Every custom menu includes speech controls and system items at the bottom, so you always have access to core yKey features from any menu
12. Floating Palettes#
Palettes are floating panels with buttons that trigger shortcuts — like a custom toolbar that hovers over your desktop. They're always visible (or auto-hide when not in use).
Creating a Palette#
- Click the Palettes tab in the editor
- Click + to create a new palette
- Configure its appearance and position
- Add buttons — each references a command using the hierarchical command picker
The Palette Editor#
The palette editor shows sections for:
Button Items: A table listing all buttons in the palette. Each button has a name and an associated command. Use + (with hierarchical command menu) and − to add/remove items.
Configuration sections:
- Contexts: Which contexts this palette is active in
- Launchers: Additional triggers for showing/hiding the palette
- Palette Display: Overall palette appearance — columns, rows, transparency, position, size
- Palette Button Display: How individual buttons look — icon size, text display, font
Set Location Feature#
The "Palette Display" section includes Default Location fields for X and Y coordinates. Click the arrow button next to these fields to enter location picker mode — your cursor changes to a crosshair, and clicking anywhere on the screen captures those coordinates as the palette's default position.
Palette Properties#
- Position: Where on screen the palette appears (use Set Location or enter X/Y coordinates)
- Size: Width and height of the palette
- Style: Background color and transparency
- Auto-hide: Hide when not in use — shows when you hover over its screen edge position
- Level: Float above other windows, or stay behind them
Use Cases#
- A "Design Tools" palette with buttons for Photoshop operations
- A "Quick Actions" palette at the screen edge with your most-used shortcuts
- A "Meeting Controls" palette that appears during Zoom calls
- A "Music" palette with play/pause/skip buttons for your media player
13. The Menu Bar#
yKey Pro places two kinds of items in your menu bar:
The Main ⚡ Bolt Icon#
The built-in yKey icon is always present. Click it for quick controls:
- Engine status: "Running — 31 shortcuts" or "Stopped"
- Start/Stop Engine: Toggle all automation on or off
- Active shortcuts list: All active shortcuts with app icons and hotkey labels — click to run instantly
- Speech submenu: Start/Stop Listening, Voice Wake toggle
- Open Editor: Opens the editor window
- Quit yKey Pro: Saves all data and exits
Mac Guide (menu bar — no editor required)#
These items turn yKey into a cross-app help hub. Verbal Mac Guide needs Accessibility only (not microphone).
| Menu item | What it does |
|---|---|
| Show / Hide Live Guide Overlay | Orange ring under the pointer; required for dwell speech |
| Speak Under Pointer | Pause ~1 second on a control → hear it explained aloud (TTS) |
| Set Up Verbal Mac Guide… | Step-by-step setup coaching (permissions + toggles) |
| Explain via yKey Hotkey (⌃⌥E) | Point at a control and press Control–Option–E once |
| Copy Mac Guide Session | Copies JSON trace of recent explain/agent steps (when available) |
| Grant Accessibility… | Opens System Settings for the one permission verbal guide needs |
For AI Coach screen peek, enable Look at the front app before answering under Preferences → AI Coach. Read-only peek is free after shareware; clicking for you requires a license.
See Set Up Verbal Mac Guide and Mac Guide Agent (Read-Only Peek) in Chapter 5.
Your Custom Menus#
In addition to the main bolt icon, any custom menu you've created with "Show in menu bar" enabled (see Chapter 11) gets its own independent status bar icon. These are fully functional dropdown menus containing:
- Your shortcuts and commands (with icons and hotkey labels)
- Separators and submenus
- Speech controls (Start/Stop Listening, Voice Wake)
- System items (Open Editor, Open Manual, Quit)
You can have as many custom menus as you want — each appears as its own icon in the menu bar. This is one of yKey's signature features, carried over from the original version.
Tips#
- If you see the outline bolt instead of the filled bolt, the engine is stopped — click to restart
- The menu bar is always available, even when the editor window is closed
- Use custom menus to organize shortcuts by category (e.g., "Dev Tools", "Writing", "Media")
- Custom menus from the old yKey are automatically imported — they'll appear just like before
14. Import, Export & Migration#
Exporting (.ykex files)#
There are multiple ways to export shortcuts:
- Drag and drop: Select one or more shortcuts in the list and drag them to Finder or the Desktop. yKey Pro creates a
.ykexfile containing the selected shortcuts and all their dependencies (commands, launchers, contexts). - Export Selected button: Select shortcuts and click the Export Selected button in the toolbar footer.
- Right-click menu: Right-click selected shortcuts and choose "Export…"
- File > Export: Use the menu bar to export.
The .ykex file is a portable JSON bundle that includes all shortcuts, commands, launchers, and contexts needed to recreate the selection on another Mac.
Use cases:
- Backing up your configuration
- Sharing shortcuts with colleagues
- Transferring shortcuts to another Mac
- Publishing Bridge Packs (see Chapter 20)
Importing (.ykex files)#
There are multiple ways to import shortcuts:
- Drag and drop: Drag one or more
.ykexfiles directly onto the shortcut list in the editor. - File > Import: Use the File menu to open an import panel where you can select multiple
.ykexfiles at once. - Open with yKey Pro: Double-click a
.ykexfile in Finder to import it directly.
Imported items receive new unique IDs so they don't conflict with your existing shortcuts. After import, a summary dialog shows how many items were imported.
Supported formats:
- New format: JSON
.ykexfiles exported from yKey Pro 3.0.0+ - Legacy format: XML plist
.ykexfiles exported from the original yKey or iKey — these are automatically detected and converted
Automatic Migration on First Launch#
When yKey Pro launches for the first time and finds no existing data, it automatically searches for old yKey/iKey data in:
~/Library/Application Support/yKey/(yKey plist format)~/Library/Preferences/iKey/(iKey plist format)
All shortcuts, commands, launchers, and contexts are imported and converted to the new JSON format. Your old data files are never modified — the import is read-only.
The automatic migration includes:
- All 22 action types with correct legacy key mapping (over 30 key name translations)
- Hotkey data with correct unpacking of the legacy packed keycode/modifier format
- Application paths with smart fallback for stale paths
- Icon data preserved from legacy
cutimagefields
Migration recovery: Keep the original app and its data backed up. Use Import Legacy and read its report before changing files. Do not delete your current
DataStore.jsonto force migration: that can discard Pro work, and an established Pro library is deliberately protected against repeated automatic imports.
Manual Legacy Import#
If the automatic import didn't run (because you already had data), click the clock icon (🕐) in the toolbar to trigger a manual import.
If your old data is in a non-standard location, copy the plist files to one of the above paths before importing.
Data Storage#
yKey Pro uses DataStore.json for shortcuts, commands, launchers, contexts, menus, and palettes. With iCloud Documents available, the cloud-sync manager can use its iCloud location; the local fallback is:
~/Library/Application Support/yKey2/Confirm the active location before making a backup. Quit yKey Pro before restoring a saved copy, and preserve the current file separately so you can undo a restore. Avoid editing the live file while the app is running.
Auto-Save#
yKey Pro automatically saves all changes when:
- You click Save & Activate in the toolbar
- You press ⌘S
- You quit the application (⌘Q or system termination)
Saving requires an active evaluation or a qualifying license. After the 30-day evaluation ends, Save & Activate does not make new shortcut edits permanent. The app continues running and shows an evaluation notice; temporary edits disappear when you restart. Existing saved shortcuts remain intact. Export is also unavailable, so do not rely on it to rescue expired-trial edits. With saving enabled, keep backups: a disk error or forced shutdown can still lose recent work.
15. Preferences & Settings#
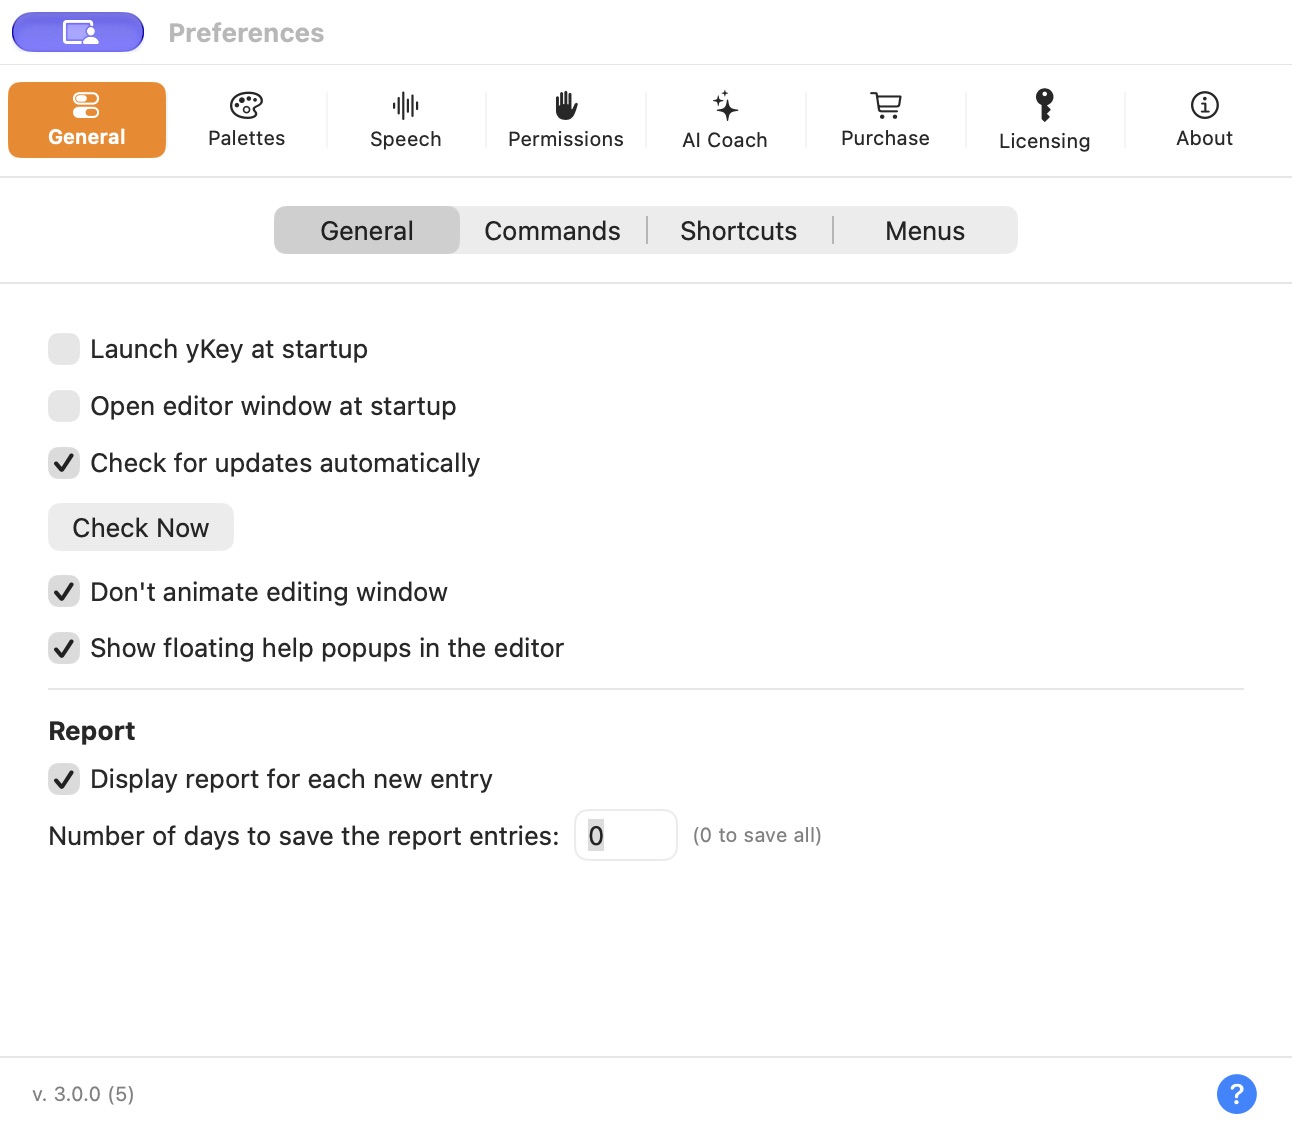
Changes in this screenshot are examples of one Mac's settings, not required defaults. Check Now opens Sparkle; a beta announcement may lead to the download page. Display report for each new entry brings the Activity Log forward after a run. Set report retention to 0 to keep all entries.
Access via the menu bar → Preferences, or ⌘, in the editor. The AI Coach also has a ⚙ icon for quick access.
Preferences are organized into 5 tabs:
General#
- Launch yKey at startup: Start yKey Pro automatically when you log in (recommended). Uses SMAppService on macOS 13+.
- Check for updates: Automatic update checks via Sparkle (direct download builds only)
- Animate editing window: Enable/disable window animation effects in the editor
- Reports: Configure logging — log each shortcut execution to the Activity Log, set retention period
Commands#
- Suggest name for new commands: Auto-generate a name based on the command type when creating a new command
- Suggest name for modified commands: Update the name when you change a command's configuration
Shortcuts#
- Default repeat count: Default number of times a new shortcut repeats (0 = no repeat)
- Default repeat pause: Default pause between shortcut repetitions
Menus#
- Show menus in menu bar: Toggle custom menus in the macOS menu bar
- Default menu display options: Configure default appearance for new menus
Palettes#
- Default palette display options: Configure default appearance for new palettes — size, position, button layout, transparency, and other visual parameters. These act as reusable defaults that you can override per-palette.
Each preference page includes a ? help icon linking to the relevant documentation section, and the version number is displayed at the bottom.
Speech#
These settings control the Speech view's voice input and output features. Access the Speech view from the editor sidebar.
- STT Provider: Choose between Apple (built-in, no setup required) and Whisper (local, private, requires model download). Apple Speech Recognition works on-device in real time and is the default. Whisper uses the open-source Whisper model for fully offline transcription.
- TTS Voice: Select from any voice installed on your Mac. Premium and Enhanced voices sound more natural — you can install additional voices in System Settings > Accessibility > Spoken Content > System Voice > Manage Voices.
- Speech Rate: Controls how fast text-to-speech speaks (words per minute). Default is 180.
- Whisper Model Size: When using Whisper STT, choose from Tiny (75 MB, fastest), Base (142 MB), Small (466 MB), or Medium (1.5 GB, most accurate). Models are downloaded on first use.
Voice Wake#
- Enable Voice Wake: Toggle always-on listening with a wake phrase. When enabled, yKey Pro keeps the microphone open and listens for the wake phrase in the background.
- Wake Phrase: The word or phrase that activates Talk Mode (default: "yKey"). Fuzzy matching handles common misrecognitions like "y key", "why key", "white key", etc.
- Requires Microphone and Speech Recognition permissions: Voice Wake needs both permissions for continuous background listening.
Hotkey (Push-to-Talk)#
- Enable Hotkey: Toggle the system-wide speech hotkey on or off. When enabled, you can tap the hotkey from any application to start/stop voice transcription.
- Hotkey: Choose from preset key combinations: ⌃⌥Space (default), ⌃⌥L, ⌘⇧L, ⌃⇧Space, F5, or F6. The hotkey is a toggle — tap once to start listening, tap again to stop.
- Requires Accessibility permission: The hotkey uses a CGEvent tap to intercept keyboard events system-wide. Grant permission in System Settings > Privacy & Security > Accessibility.
Tip — Hold-to-Talk vs. Hotkey Toggle The Speech view has two ways to speak:
- Hold-to-Talk buttons (in the UI): Press and hold to listen, release to stop. Works like a walkie-talkie.
- System-wide hotkey (keyboard shortcut): Tap once to start listening, tap again to stop. Works from any application, even when yKey Pro is in the background.
Updates (Direct download only)#
- Check for updates automatically: Uses Sparkle to check for new versions
- Check for Updates...: Manual update check
iCloud Sync#
yKey Pro automatically syncs all your data across multiple Macs via iCloud Drive. This includes shortcuts, menus, palettes, contexts, preferences, and your speech correction dictionary. When you create or modify a shortcut on one Mac, it appears on your other Macs within moments.
How it works:
- Data is stored in yKey Pro's iCloud Drive container, which macOS syncs automatically
- If iCloud is not available (not signed in, or no internet), data is stored locally and syncs when connectivity returns
- A local backup is always maintained alongside the iCloud copy, so your data is never at risk
- Changes from other Macs are detected automatically and loaded in real time
What syncs:
| Data | Synced? | Notes |
|---|---|---|
| Shortcuts, actions, triggers | Yes | The core DataStore.json |
| Menus, palettes, contexts | Yes | Part of DataStore.json |
| Preferences | Yes | Part of DataStore.json |
| Speech correction dictionary | Yes | SpeechDictionary.json |
| MCP tool permissions | No | mcp-policy.json is local to each Mac (security settings deliberately don't follow you between machines) |
| Whisper models | No | Too large (75 MB–1.5 GB); downloaded per-Mac |
| AI Coach conversations | No | Conversations are local to each Mac |
Requirements:
- Signed in to iCloud on all Macs (System Settings > Apple ID > iCloud)
- iCloud Drive enabled
- No additional setup needed — sync starts automatically
Storage location:
- iCloud:
~/Library/Mobile Documents/iCloud~com~plumamazing~ykeypro/Documents/ - Local fallback:
~/Library/Application Support/yKey2/
Tip: If you want to see or back up your synced data, you can find it in Finder under iCloud Drive. The JSON files are human-readable.
16. URL Scheme#
Run, Start and Stop require authorization. A link without a valid local token asks for confirmation. An invalid token does not bypass the prompt. The Editor link only opens a window. Treat a token-bearing URL as private: do not embed it in a public page or support screenshot.
The examples below intentionally omit the token, so expect a confirmation dialog before a state-changing request proceeds. For a first test, use only the harmless Hello World shortcut from Chapter 5.
yKey Pro responds to ykey:// URLs, allowing other applications, scripts, and websites to trigger yKey Pro operations.
| URL | Action |
|---|---|
ykey://run?name=ShortcutName |
Run a shortcut by name |
ykey://run?id=<shortcut-id> |
Run a shortcut by its unique ID |
ykey://editor |
Open the editor window |
ykey://start |
Start the engine |
ykey://stop |
Stop the engine |
Examples#
From Terminal:
open "ykey://run?name=Hello%20World"From a shell script:
open "ykey://start"
sleep 2
open "ykey://run?name=Deploy"
open "ykey://stop"
From a web page (Safari):
<a href="ykey://run?name=MyShortcut">Run yKey Shortcut</a>From AppleScript:
open location "ykey://run?name=Morning%20Routine"Shortcuts App & Siri (App Intents)#
yKey Pro also appears in the Shortcuts app and Siri on Mac. These intents call the same engine APIs as the URL scheme above — no ykey:// URLs required.
| Intent | What it does |
|---|---|
| Start yKey Engine | Starts the automation engine |
| Stop yKey Engine | Stops the engine |
| Run yKey Shortcut | Runs a shortcut — pick from the dynamic shortcut list, or pass a name or numeric ID (starts the engine first if needed) |
| Get yKey Engine Status | Returns whether the engine is running (for Shortcuts If actions) |
| Open yKey Editor | Opens the editor; optional guide parameters match ykey://editor deep links |
Example Shortcuts workflow: Get yKey Engine Status → If not running, Start yKey Engine → Run yKey Shortcut (pick from list) → Stop yKey Engine.
App Intent runs are user-initiated from Shortcuts or Siri and do not require the URL-scheme security token used by untrusted ykey://run links from browsers.
17. AppleScript Support#
yKey Pro includes a full AppleScript dictionary (.sdef), making it scriptable from any AppleScript-capable tool.
Available Commands#
-- Run a shortcut by name
tell application "yKey Pro"
    run shortcut "My Shortcut"
end tell

-- List all shortcuts
tell application "yKey Pro"
    set names to list shortcuts
end tell

-- Control the engine
tell application "yKey Pro"
    start engine
    stop engine
    toggle engine
end tell

-- Get engine status
tell application "yKey Pro"
    set running to engine status
    -- returns "running" or "stopped"
end tell

-- Type text directly
tell application "yKey Pro"
    type text "Hello from AppleScript!"
end tell

-- Press a key combination
tell application "yKey Pro"
    press key "s" with command
end tell

-- Open the editor
tell application "yKey Pro"
    open editor
end tell
Integration with Other Tools#
Since yKey Pro is scriptable, any tool that can run AppleScript can control it:
- Automator workflows
- Shortcuts.app via the "Run AppleScript" action
- Raycast or Alfred via custom scripts
- Keyboard Maestro via AppleScript actions
- Hazel rules that trigger shortcuts based on file events
18. AI & MCP Integration#
This is the transformative feature of yKey Pro 3.0.0. MCP (Model Context Protocol) turns yKey Pro into a bridge between AI assistants and your Mac — giving AI the ability to see, click, type, and automate anything you can do.
What Is MCP?#
MCP is an open standard created by Anthropic for AI tool use. It defines a way for AI assistants to discover and use tools on your computer. Think of it as a universal remote control that any AI can understand.
yKey Pro acts as an MCP server — it provides tools that AI assistants can use. When connected, the AI can see your screen, interact with applications, and run your shortcuts.
What AI Assistants Can Use MCP?#
Any AI tool that supports the MCP standard:
- Cursor (the IDE you may be using right now)
- Claude Desktop (Anthropic's desktop app)
- ChatGPT Desktop (with plugin support)
- Gemini (Google's AI assistant)
- Any MCP-compatible tool — the standard is open and growing
How to Connect#
Built-in Mac Guide and external MCP are different setup paths. Mac Guide can use its in-process tools without a separately installed server. An external client such as Cursor needs the standalone executable. Beta 5 does not ship that executable at the app-bundle path used by earlier drafts. If you do not build software, request an approved standalone-server package from support rather than pointing your client at a missing file.
Step 1: Build the MCP Server
The MCP server is included with yKey Pro. If you're building from source:
cd yKeyProMCP
swift build -c release
This creates the server binary at .build/release/yKeyProMCP. Use the actual absolute path on your Mac. In the client's server environment, set YKEY_MCP_TOKEN to a local value at least 16 characters long. This is an explicit enable switch, not per-request authentication. It does not replace the MCP policy or approval broker. Keep example placeholders out of your final configuration.
Step 2: Configure Your AI Tool
For Cursor: Create or edit the file ~/.cursor/mcp.json:
{
  "mcpServers": {
    "yKeyProMCP": {
      "command": "/absolute/path/to/yKeyProMCP",
      "args": []
    }
  }
}
If you built from source, use the build path:
{
  "mcpServers": {
    "yKeyProMCP": {
      "command": "/path/to/yKeyProMCP/.build/release/yKeyProMCP",
      "args": []
    }
  }
}
For Claude Desktop: Edit ~/Library/Application Support/Claude/claude_desktop_config.json:
{
  "mcpServers": {
    "yKeyProMCP": {
      "command": "/absolute/path/to/yKeyProMCP",
      "args": []
    }
  }
}
Step 3: Restart Your AI Tool
After saving the configuration file, restart the AI tool. It will discover the yKey MCP server and its tools automatically.
Step 4: Verify
Ask your AI assistant: "Can you take a screenshot?" or "Can you list the running applications?" If it responds with actual information from your screen, the connection is working.
Available MCP Tools#
The MCP server exposes these tools to AI assistants:
| Tool | What It Does | Example Use |
|---|---|---|
screenshot |
Captures the entire screen or a region | "What's on my screen?" |
read_screen |
Reads the accessibility tree of an app — all buttons, fields, labels | "What buttons are in this dialog?" |
find_element |
Finds UI elements by role, title, or value | "Find the Save button" |
click |
Clicks at screen coordinates | "Click the OK button" |
type_text |
Types text at the current cursor position | "Type my email address" |
press_key |
Presses a key combination | "Press Command+S to save" |
mouse_move |
Moves the cursor to a position | "Move to the toolbar" |
mouse_drag |
Drags from one point to another | "Drag this file to the folder" |
mouse_scroll |
Scrolls the mouse wheel | "Scroll down to see more" |
get_windows |
Lists all visible windows with positions | "What windows are open?" |
move_window |
Repositions or resizes a window | "Move Safari to the left half" |
focus_window |
Brings a window to front | "Switch to Terminal" |
activate_app |
Activates an application | "Open Finder" |
list_apps |
Lists all running applications | "What apps are running?" |
run_shell |
Executes a shell command | "Run git status" |
get_clipboard |
Reads the clipboard contents | "What's on my clipboard?" |
set_clipboard |
Sets the clipboard text | "Copy this text to clipboard" |
open_url |
Opens a URL in the browser | "Open github.com" |
click_menu |
Clicks a menu bar item by path | "Click File → Save As" |
speak |
Speaks text aloud using text-to-speech | "Say 'Hello Julian'" |
listen |
Listens through the microphone and transcribes speech | "What did I just say?" |
list_voices |
Lists available TTS voices on the Mac | "What voices are available?" |
stop_speaking |
Stops any speech currently playing | "Stop talking" |
click_element |
Presses a button/checkbox via accessibility — no cursor movement, no focus stealing | "Click Save without moving my mouse" |
wait_until |
Waits for a window or element to appear or disappear | "Wait for the export dialog to close" |
compare_screenshots |
Takes a baseline, then reports exactly what changed on screen | "Did that click actually do anything?" |
perform_actions |
Runs a whole sequence of clicks/keys/waits in one call | "Fill out this whole form" |
check_policy |
Lets the AI check what it's allowed to do before trying | — |
boost_rate_limit |
Julian's Burst Rate Limiting Algorithm (see below) | "Go full speed for 20 seconds" |
shell_session |
Persistent terminal sessions that survive between calls | "Keep the dev server running and check its logs" |
set_agent_identity |
The AI names itself for the audit log | — |
send_agent_message / read_agent_messages |
Message bus so multiple AIs on one Mac can coordinate | Two agents dividing up work |
ykey_list_shortcuts / ykey_describe_shortcut |
Inspects the person's yKey automations and their triggers without exposing saved secrets | "How does my invoice shortcut work?" |
ykey_create_shortcut / ykey_create_action |
Builds a new yKey workflow from named actions | "Make me a shortcut that prepares meeting notes" |
ykey_run_shortcut |
Runs a yKey workflow and normally waits for its final text result | "Run Website Check and tell me what it found" |
ykey_execution_result |
Checks a long-running asynchronous yKey execution by its ID | "Is the research workflow finished?" |
Additional MCP tool reference#
The external server advertises more tools than the introductory table. Use check_policy and the client's tool schema for exact parameters. These are external-server capabilities; the built-in Coach's read-only mode uses a smaller allowlist.
| Tool | Purpose and limits |
|---|---|
check_permissions / request_permission |
Inspect permission status or request a macOS prompt; they cannot grant consent for you. |
list_input_devices |
List audio inputs before selecting a microphone. |
launch_app / list_app_instances / kill_app |
Start, inspect or terminate an app instance. Termination can lose unsaved work. |
tile_window |
Arrange a window using the supported layout parameters. |
get_frontmost_blocker / dismiss_dialog |
Inspect a blocking dialog and, when allowed, dismiss it. Read the button meaning first. |
query_log |
Query system logs. This is sensitive observation and defaults to Ask. |
shortcuts_list / shortcuts_run / shortcuts_view |
List, run or inspect Apple Shortcuts, separate from yKey shortcuts. |
ykey_list_actions / ykey_engine_status |
Inspect the app's actions and engine status. |
ykey_add_action_to_shortcut / ykey_create_hotkey_trigger |
Assemble a yKey shortcut from actions and a hotkey. Verify the target before enabling it. |
ykey_update_shortcut_note |
Edit a shortcut's explanatory note. |
ykey_start / ykey_stop / ykey_save |
Control the app engine and request persistence. Saving remains subject to evaluation/license policy. |
Results and recovery: ykey_run_shortcut normally waits for the final text result. Its wait timeout defaults to 120 seconds and accepts 1–300 seconds. An asynchronous run returns an execution ID; use ykey_execution_result to check it instead of launching the shortcut a second time. A timeout does not by itself prove that an external effect did not happen. Inspect the destination and Activity Log before retrying a message, file operation or web request.
Julian's Burst Rate Limiting Algorithm#
yKey Pro throttles AI actions (clicks, keystrokes, shell commands) to a safe budget — 30 per minute by default — so a runaway agent can't flail at your Mac faster than you can react. But sometimes an AI legitimately needs a burst of speed: filling a long form, running a UI stress test.
The solution is Julian's Burst Rate Limiting Algorithm (Julian Miller, 2026, gifted freely to the world): the AI may raise the rate limit to whatever it wants — but only for up to 20 seconds at a time, after which the limit automatically drops back to normal. No setting to remember to turn off, no permanently unleashed agent. It's an interface between the lightning-fast reactions of AI and the slower biological reactions of the humans supervising them: the AI gets its sprint, and the steady state always returns to human speed.
The Audit Log — See Everything Every AI Did#
Every action an AI takes through yKey Pro (and every action that was denied) is recorded permanently to an audit file, stamped with which AI did it, when, and what the decision was. Open Editor → Security to watch it live — the log survives restarts, so you can always answer "what happened while I was away?" Multiple AIs on one Mac each appear under their own name.
Persistent Shell Sessions#
Classic run_shell runs one command and returns. The shell_session tool gives an AI a real, persistent terminal (on a PTY, like a human's terminal window): it can start a dev server, come back later to read new output, type into an interactive program, and keep up to 8 named sessions alive across an entire working session.
The Agent Message Bus#
If you run more than one AI on the same Mac (say, one improving yKey and one testing another app), they can coordinate through named message channels — persistent, timestamped, sender-labeled. yKey Pro acts as the shared ground the agents stand on.
The AI Action Plugin (Built-in)#
Even without an external AI connection, you can use the built-in AI Action plugin to call language models directly from a shortcut:
- Summarize clipboard content with a hotkey (⌃⌥S)
- Translate selected text (⌃⌥T)
- Generate code from a description
- Proofread and fix grammar
- Ask questions about selected text
This works with OpenAI (GPT-4, etc.), Anthropic (Claude), or local models (Ollama, LM Studio) — you provide your own API key.
What Can AI Actually Do With yKey Pro?#
With the MCP connection, an AI assistant can:
- See your screen — take screenshots, read UI element trees
- Control applications — click buttons, fill forms, navigate menus
- Type and edit text — compose emails, write code, fill out documents
- Manage windows — arrange your desktop, move apps between monitors
- Run commands — execute shell commands, scripts, and programs
- Speak and listen — talk to you aloud and hear your voice responses (see Speech & Voice Control)
- Create yKey shortcuts — the AI can build new automation shortcuts programmatically
- Run existing shortcuts — trigger any of your yKey shortcuts and receive its final text result directly
Example conversation with an AI (via Cursor with MCP):
You: "Set up my work layout — Safari on the left, VS Code on the right, Slack in the bottom-right corner"
AI: takes screenshot → reads window list → moves Safari to left half → moves VS Code to right half → resizes Slack to bottom-right quarter → "Done! Your work layout is set up."
Security Considerations for MCP#
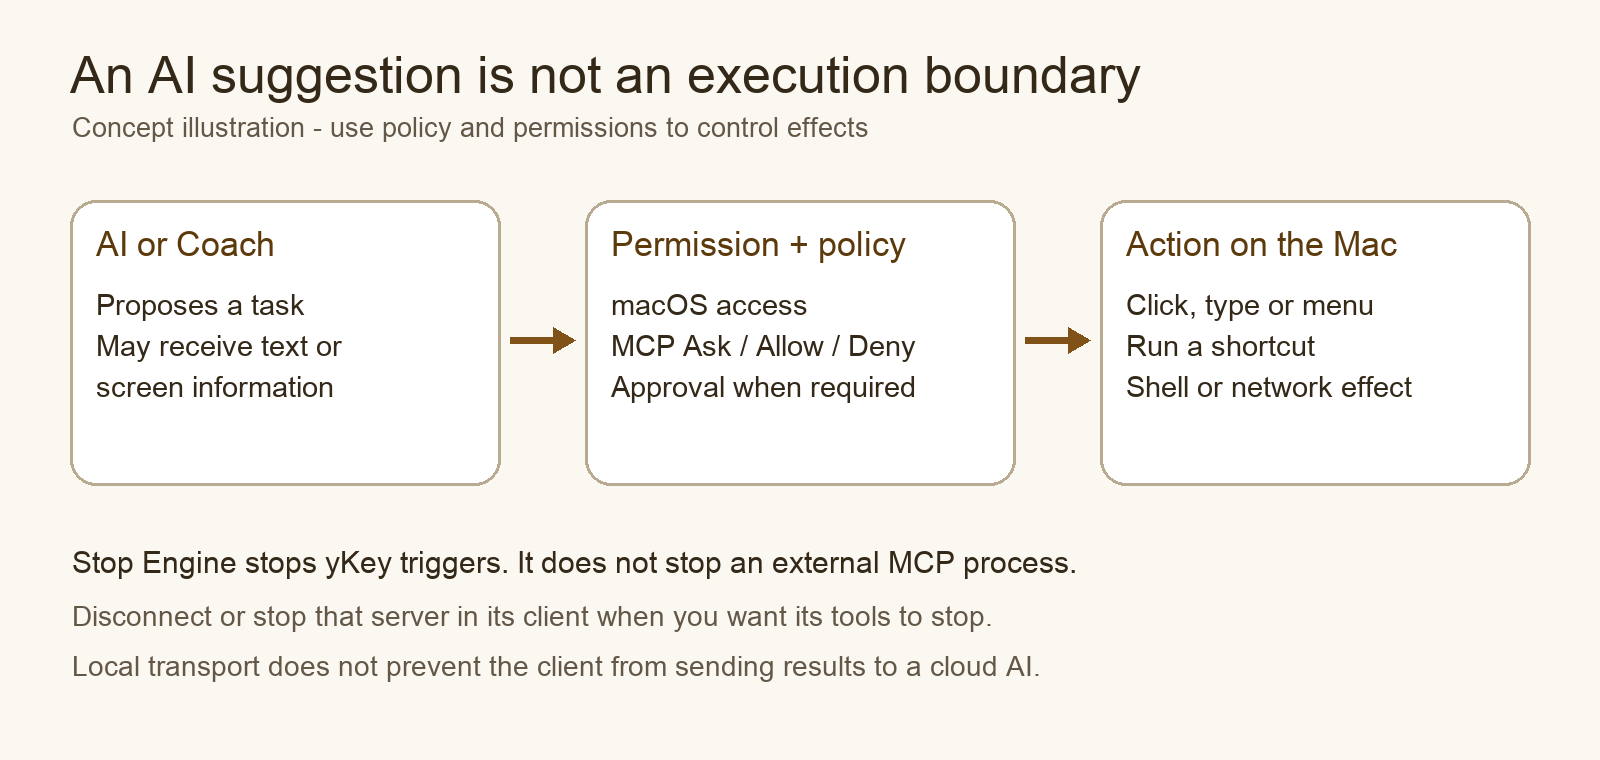
A safe first connection test: ask for the list of running apps, then compare the names with your Mac. Do not begin with a screenshot of private material or a shell command.
In Editor → Security, inspect Ask, Always Allow and Deny for each tool. Balanced policy normally allows selected observations and asks for actions; Lockdown denies tools; Permissive allows them. A per-tool rule overrides the global default. If the approval broker cannot be reached, an Ask action is refused rather than silently allowed. Choose a narrow rule for a task rather than changing the whole policy merely to remove a prompt.
A text promise from an AI is not a sandbox. Keep a human checkpoint before sending a message, deleting files or running unfamiliar code. Stop the shortcut engine to stop its triggers; disconnect the separate server in the AI client to stop its independent tools.
Please read the Permissions & Security chapter carefully.
Key points:
- External clients launch the MCP server locally over standard input/output. Local transport does not make cloud AI private: a client can send tool results, screenshots or text to its model provider.
- Quitting yKey Pro stops its shortcut engine and app bridge. A separately running external MCP server can still expose its own screen, shell and application tools; stop or disconnect that server in the AI client too.
- Screen actions are visible, but shell commands and network requests may have effects outside the front window. Review the tool request and its arguments, not just what happens on screen.
- Review what the AI is doing, especially with shell commands
- Never paste API keys or passwords while an AI has screen access
- The AI has the same permissions as yKey Pro — it can do anything yKey Pro can do
The Built-in AI Coach#
yKey Pro includes a built-in AI Coach — a chat interface inside the editor that acts as your personal yKey Pro expert. It knows the entire manual, can see your shortcut configuration, and gives you specific, actionable help.
What the AI Coach can do:
- Walk you through creating shortcuts step by step
- Troubleshoot why a shortcut isn't working
- Suggest automation workflows you haven't thought of
- Explain any feature in plain language
- Help you build Bridge Packs for your favorite apps
What the AI Coach needs: an available model provider. Apple on-device AI and a local server may work without an API key; cloud providers require their own credentials and billing. An AI chat subscription is not automatically an API allowance. Choose the provider in Coach settings and check its availability before sending a question.
Setting Up the AI Coach
Step 1: Choose an AI Provider
| Provider | Recommended Model | Cost | Best For |
|---|---|---|---|
| Anthropic (Claude) | claude-sonnet-4-6 | Provider billing | Best instruction-following, best at detailed system prompts. Our recommendation. |
| OpenAI (GPT-4) | gpt-4o | Provider billing | Widely known, fast, good general-purpose |
| Local (Ollama) | llama3:70b | Free (runs on your Mac) | Privacy, no internet needed. Requires 32GB+ RAM for good results. |
Our recommendation: Anthropic Claude. It's the best at following the detailed system prompt (the manual), gives the most accurate answers about yKey Pro features, and the API is simple to set up.
Step 2: Get an API Key
For Anthropic (recommended):
- Go to console.anthropic.com
- Create an account (or sign in)
- Go to API Keys in the dashboard
- Click Create Key
- Copy the key (starts with
sk-ant-) - Review the current API billing requirements before using this account.
For OpenAI:
- Go to platform.openai.com
- Create an account (or sign in)
- Go to API Keys
- Click Create new secret key
- Copy the key (starts with
sk-) - Review the current API billing requirements before using this account.
For Ollama (free, local):
- Download Ollama from ollama.com
- Install and run it
- In Terminal, run:
ollama pull llama3:70b(orllama3:8bfor smaller Macs) - No API key needed — it runs on localhost
Step 3: Configure in yKey Pro
- Open the yKey Pro editor
- Click AI Coach in the sidebar
- Click the gear icon (⚙) for settings
- Select the available provider: Apple, OpenAI, Anthropic, Google Gemini, Local (Ollama), or Custom API
- Paste your API key
- Choose a model (or leave the default)
- Click Save
Step 4: Start Chatting Click + New Conversation and ask anything:
- "How do I create a shortcut that types my email signature?"
- "My hotkey ⌃⌥R isn't working. What should I check?"
- "What's the best way to automate window layouts?"
- "Can you help me set up a morning routine shortcut?"
The coach knows the entire manual and can see your current shortcuts, so its answers are specific to your setup.
How the AI Coach Works Internally
The coach sends the full yKey Pro manual as a system prompt to the AI model, along with:
- A summary of your current shortcut configuration
- Your recent Activity Log entries
- The conversation history
This means the AI has complete knowledge of yKey Pro AND context about your specific setup. It's like having a yKey expert looking over your shoulder.
Manual Loading & Caching
The AI Coach loads the manual only when you open the AI Coach panel — not at app launch, not in the background. If you never use the coach, nothing is fetched and nothing is charged.
When you first open the coach, you'll see a brief message: "The coach is digesting the manual — one moment please..." followed by "OK, ask away!" once it's ready.
How the cache works:
- First use: The coach fetches the latest manual from the cloud and saves a local copy to disk (
~/Library/Application Support/yKey Pro/manual-cache.txt). - Subsequent uses (same day): The coach loads instantly from the local disk cache — no network fetch, no delay.
- After 24 hours: The next time you open the coach, it serves the cached copy immediately (so you're never waiting) and silently refreshes in the background. This means you always get the latest manual within a day of any update.
- Within a session: Once loaded, the manual stays in memory. Switching away from the coach and back is instant.
Bottom line: You only "pay" for the manual fetch once per day, and only if you actually use the coach. The fetch itself is free (it's just downloading text). The API cost only happens when you send a message.
Cost Expectations
Cloud providers bill your account separately. The amount of manual context, conversation history and tool results affects usage. Review the provider’s billing controls before sending requests. Local models avoid cloud API charges.
Privacy
- Your questions and the manual are sent to the AI provider's API
- For Ollama (local), everything stays on your Mac
- No conversation data is shared with yKey Pro / Plum Amazing
- Conversations are stored locally in
~/Library/Application Support/yKey Pro/ - The manual cache is stored locally — the only network call is to Google Docs (to fetch the latest manual text)
19. Speech & Voice Control#
yKey Pro includes a built-in speech interface that gives both humans and AI the ability to communicate by voice. You can talk to your Mac and hear it respond — from any application, without touching the keyboard.
This is more than a convenience feature. For users with limited mobility, for hands-busy workflows, or for AI assistants that need to interact conversationally, speech transforms yKey Pro from a keyboard automation tool into a full voice-controlled operating environment.
Overview#
The Speech view (accessible from the editor sidebar) provides:
- Speech-to-Text (STT): Speak into your microphone and see your words transcribed in real time
- Text-to-Speech (TTS): yKey Pro speaks text aloud using any of your Mac's installed voices
- Push-to-Talk buttons: Hold a button to listen, release to stop — like a walkie-talkie
- System-wide hotkey: Tap a keyboard shortcut from any app to toggle listening on and off
- Conversation history: A scrollable log of everything said — by you and by the AI
- MCP integration: AI assistants can speak and listen through the
speakandlistenMCP tools
Permissions Required#
Speech requires three macOS permissions. yKey Pro will prompt for all three the first time you use the Speech view. You can also click the Allow button in the Speech view's top bar.
| Permission | What It Enables | System Settings Location |
|---|---|---|
| Microphone | Recording your voice | Privacy & Security → Microphone |
| Speech Recognition | Apple's on-device transcription engine | Privacy & Security → Speech Recognition |
| Accessibility | System-wide hotkey interception (CGEvent tap) | Privacy & Security → Accessibility |
The Speech view shows three colored indicators (green = granted, orange = needed) for each permission at the top of the view. All three must be green for full functionality.
Note: After granting Accessibility permission, you may need to restart yKey Pro for the change to take effect. This is a macOS limitation — the TCC (Transparency, Consent, and Control) system caches permission state.
Using the Speech View#
Open the Speech view by clicking Speech in the editor sidebar (the waveform icon).
Hold-to-Talk Buttons
There are two hold-to-talk buttons:
- Top-left button (microphone icon): Press and hold to listen. The button turns red while listening. Release to stop and process your speech.
- Bottom-right "Listen" button: Same behavior — press and hold to listen, release to stop.
Both buttons work identically. The button turns red immediately when you press it (indicating active listening) and returns to its default color when you release.
System-Wide Hotkey
The hotkey lets you start and stop listening from any application — you don't need to have yKey Pro in the foreground.
How it works:
- Toggle the hotkey switch ON in the Speech view
- Choose a key combination from the dropdown (default: ⌃⌥Space)
- From any application, tap the hotkey once to start listening
- Tap it again to stop listening and process your speech
The hotkey is a toggle, not hold-to-talk. This is because you can't hold down a modifier key combination the way you hold down a mouse button. One tap starts, another tap stops.
Available hotkey presets:
| Hotkey | Notes |
|---|---|
| ⌃⌥Space | Default. Unlikely to conflict with other apps. |
| ⌃⌥L | "L" for Listen. |
| ⌘⇧L | Uses Command instead of Control. |
| ⌃⇧Space | Alternative space-based combo. |
| F5 | Function key — no modifiers needed. |
| F6 | Function key — no modifiers needed. |
| ⌃⌃ (Double-tap Control) | Tap the Control key twice quickly. Natural and unobtrusive — no other keys needed. Detected via a flagsChanged CGEvent tap that measures the time between consecutive Control key presses. |
Tip: If a hotkey conflicts with another application (e.g., Spotlight, Siri), choose a different preset. F5 and F6 are safe choices that rarely conflict.
Tip: The hotkey uses a CGEvent tap, which consumes the key event before macOS processes it. This means no system alert sound plays when you press the hotkey — the event is intercepted silently.
Conversation History
The center of the Speech view shows a scrollable conversation log with three types of messages:
- You (human): Your transcribed speech, shown after processing completes
- AI: Text spoken by the AI via TTS
- System: Status messages (permissions granted, errors, hotkey activated)
Click Clear to reset the conversation history.
Speech-to-Text (STT) Providers#
yKey Pro supports two STT providers, selectable in Preferences:
Apple Speech Recognition (Default)
- Uses Apple's built-in
SFSpeechRecognizer - Works on-device with real-time partial results
- No download or API key required
- Supports multiple languages (set in the Speech view)
- Best for quick, responsive transcription
Whisper (Local)
- Uses OpenAI's open-source Whisper model running locally on your Mac via SwiftWhisper
- Completely private — no data leaves your Mac
- Requires a one-time model download (75 MB–1.5 GB depending on model size)
- Transcription happens after you stop speaking (not real-time)
- Best for accuracy and privacy
Whisper model sizes:
| Model | Size | Speed | Accuracy |
|---|---|---|---|
| Tiny | 75 MB | Fastest | Good for short phrases |
| Base | 142 MB | Fast | Good general use |
| Small | 466 MB | Moderate | High accuracy |
| Medium | 1.5 GB | Slow | Highest accuracy |
Models are stored in ~/Library/Application Support/yKey Pro/WhisperModels/.
Text-to-Speech (TTS)#
yKey Pro uses macOS's built-in say command for TTS, which supports all voices installed on your Mac.
Choosing a voice:
- Open the Speech view and select a voice from the dropdown
- Premium and Enhanced voices sound significantly more natural than Default voices
- Install more voices: System Settings > Accessibility > Spoken Content > System Voice > Manage Voices
Recommended voices:
- Samantha (en-US): Clear, natural female voice (default)
- Alex (en-US): Natural male voice (Premium quality, large download)
- Ava (en-US): Modern female voice (Enhanced quality)
The AI can also speak via MCP using the speak tool, which accepts a voice name and speaking rate.
Speech Input Method#
When speech is transcribed, yKey Pro needs to type the text into the current application. There are two methods, selectable in Preferences and in the Speech view:
| Method | How It Works | Best For |
|---|---|---|
| Paste (Clipboard) | Copies text to clipboard, then pastes with ⌘V. Fast but replaces your clipboard. | Speed — types entire sentences instantly |
| Direct Typing (CGEvent) | Types each character individually using CGEvent.keyboardSetUnicodeString(). Preserves clipboard. |
Natural appearance — text appears character by character. No clipboard impact. |
Choose Paste for speed, or Direct Typing to preserve your clipboard contents. The preference is visible in both the main Preferences window and the Speech settings page in the editor.
MCP Speech Tools#
AI assistants connected via MCP can use these speech tools:
| Tool | Parameters | What It Does |
|---|---|---|
speak |
text, voice, rate, wait |
Speaks text aloud. Set wait: false to speak in the background. |
listen |
duration, language |
Listens for speech and returns transcribed text. |
list_voices |
language (optional) |
Lists all available TTS voices, optionally filtered by language. |
stop_speaking |
— | Stops any speech currently playing. |
Example — AI asks a question and waits for your answer:
AI calls
speak("What would you like me to do next?")→ waits → callslisten(duration: 10)→ receives your transcribed response → acts on it.
Voice Wake (Always-On Listening)#
Voice Wake lets yKey Pro listen continuously for a wake phrase so you can activate it hands-free — no hotkey, no button, no keyboard at all. Say the wake phrase, and yKey Pro begins listening for your command.
How it works:
- Enable Voice Wake in Preferences > Speech & Sound (or from the Speech view)
- Set your wake phrase (default: "yKey")
- yKey Pro keeps the microphone open and runs lightweight speech recognition in the background
- When it detects the wake phrase, it activates Talk Mode — full transcription of everything you say next
- After you stop speaking, the transcribed text is processed as a command
Fuzzy wake phrase matching: yKey Pro uses fuzzy matching to handle the many ways people (and speech engines) might say "yKey." All of the following are recognized:
| What You Say | Recognized? |
|---|---|
| "yKey" | Yes |
| "y key" | Yes |
| "why key" | Yes |
| "white key" | Yes |
| "waikiki" | Yes |
| "Y key" | Yes |
You can configure a custom wake phrase in Preferences if you prefer something else.
Permission handling: Voice Wake requires Microphone and Speech Recognition permissions. If permissions are not granted, yKey Pro will retry up to 3 times with a brief delay between attempts, then report the failure in the Activity Log.
Debugging: Voice Wake logs all recognition attempts via NSLog. If you suspect it's not hearing your wake phrase, open Console.app, filter for "yKey", and look for wake phrase matching entries.
Tip: Voice Wake works best in a quiet environment. In noisy settings, use the system-wide hotkey or hold-to-talk buttons instead.
Note: Voice Wake keeps the microphone active continuously. A microphone indicator appears in the macOS menu bar when active (this is a macOS requirement, not a yKey Pro choice). Battery impact is minimal on Apple Silicon Macs thanks to the Neural Engine.
Accessibility & Hands-Free Use#
Speech in yKey Pro is designed with accessibility in mind:
- Users with limited mobility can control their Mac entirely by voice — the AI sees the screen, hears commands, and acts
- Users in noisy environments can use the hold-to-talk buttons to avoid picking up background chatter
- Vision-impaired users can hear AI responses spoken aloud and dictate commands
- Multitasking users can trigger the hotkey without looking at or switching to yKey Pro
Combined with MCP, speech creates a complete voice-driven Mac experience: "Move Safari to the left half of the screen" → the AI does it. "Read me my latest email" → the AI does it. No keyboard or mouse needed.
20. Giving This Manual to an AI#
One of the most powerful things about yKey Pro + MCP is that you can give this manual to any AI assistant and it will immediately know how to operate your Mac.
How It Works#
- Copy this manual (or the relevant sections)
- Paste it into your AI assistant's context (Claude, ChatGPT, Gemini, or any LLM)
- Tell the AI: "You have access to yKey Pro on my Mac via MCP. Here's the manual."
- The AI now understands:
- What yKey Pro can do
- What MCP tools are available
- How to create and run shortcuts
- How to chain actions for complex workflows
- What permissions are needed and what the limitations are
What to Include#
For a quick setup, share these sections:
- Chapter 17 (AI & MCP Integration) — the MCP tools table
- Appendix A (MCP Configuration Reference) — the config JSON
For a full briefing, share the entire manual. The AI will then understand:
- All 30 action types and their parameters
- The trigger and context system
- How to build complex workflows
- Security considerations and warnings
- Troubleshooting steps
Example Prompt for Your AI#
I have yKey Pro installed on my Mac with the MCP server running.
You have access to these tools: screenshot, read_screen, find_element,
click, type_text, press_key, mouse_move, mouse_drag, mouse_scroll,
get_windows, move_window, focus_window, activate_app, list_apps,
run_shell, get_clipboard, set_clipboard, open_url, click_menu.

Here's the full yKey Pro manual: [paste manual]

Please help me automate my Mac. Start by taking a screenshot to see
what's currently on my screen.
Important Notes#
- The AI will only be as effective as its MCP connection — make sure the setup in Chapter 18 is complete
- Different AI models have different capabilities — Claude and GPT-4 are better at complex multi-step operations
- The AI can create new yKey shortcuts programmatically, which persist after the AI session ends
- This is not a remote control — the AI operates through your locally-running yKey Pro instance
21. Bridge Packs — App-Specific Automation#
Bridge Packs are collections of shortcuts, actions, and AI prompts optimized for a specific application. Think of them as "yKey Pro profiles" that give both you and your AI deep expertise in controlling a particular app.
What's in a Bridge Pack?#
A Bridge Pack is a .ykex file (yKey Pro's export format) containing:
- Pre-built shortcuts — Common operations mapped to sensible hotkeys
- Action chains — Multi-step workflows specific to the app
- Contexts — All shortcuts are scoped to the target app
- AI prompts — System prompts that teach an AI how the app works
- Documentation — What each shortcut does and how to customize it
Example: Photoshop Bridge Pack#
A Photoshop Bridge Pack might include:
| Shortcut Name | Hotkey | What It Does |
|---|---|---|
| PS: New Document | ⌃⌥N | Creates a new document with your preferred settings |
| PS: Quick Export PNG | ⌃⌥E | File → Export → Quick Export as PNG |
| PS: Resize Canvas | ⌃⌥R | Image → Canvas Size with preset values |
| PS: Flatten & Save | ⌃⌥F | Layer → Flatten Image, then ⌘S |
| PS: Batch Watermark | ⌃⌥W | Runs a Photoshop action to apply watermark to all open images |
| PS: Smart Sharpen | ⌃⌥S | Filter → Sharpen → Smart Sharpen with your preferred settings |
| PS: Export All Layers | ⌃⌥L | File → Export → Layers to Files |
| PS: Reset Workspace | ⌃⌥0 | Window → Workspace → Reset to default |
Each of these shortcuts uses yKey Pro actions: Menu clicks, Key Shortcuts, Pauses (to wait for dialogs), Interface actions (to click dialog buttons), and Conditionals (to check if a document is open first).
The Bridge Pack also includes an AI system prompt:
You are a Photoshop expert controlling Adobe Photoshop via yKey Pro MCP tools.
You know these menu paths: File → New, File → Export → Quick Export as PNG,
Image → Image Size, Image → Canvas Size, Layer → Flatten Image,
Filter → Sharpen → Smart Sharpen, Window → Workspace → [name]...
When the user asks you to edit an image, use click_menu to navigate menus,
press_key for keyboard shortcuts, and read_screen to verify dialog contents.
Always check if a document is open before operating on it.
How Apps Like Photoshop Interact With MCP#
Photoshop itself doesn't need to know about MCP. The MCP tools work at the operating system level:
read_screenreads Photoshop's accessibility tree — every menu, panel, button, and text fieldclick_menunavigates Photoshop's menus:["Photoshop", "Filter", "Blur", "Gaussian Blur..."]press_keysends keyboard shortcuts that Photoshop recognizes (⌘Z for undo, B for brush, V for move)clickclicks on Photoshop's toolbar, panels, and canvas at specific coordinatesscreenshotlets the AI see what's on the canvas and in the panelsfind_elementlocates specific UI elements by their accessibility label
The app doesn't need plugins or APIs — yKey Pro controls it the same way you do: through the keyboard, mouse, and menus. The AI just does it faster and can follow complex instructions.
Bridge Packs for Other Apps#
The same pattern works for any application:
| Bridge Pack | Key Operations |
|---|---|
| Final Cut Pro | Timeline navigation, effects, transitions, export presets |
| Logic Pro | Track management, plugin chains, mixing, bounce |
| Xcode | Build configurations, simulator management, code formatting |
| Microsoft Office | Document formatting, mail merge, spreadsheet operations |
| Figma (web) | Component creation, auto-layout, export |
| Terminal/iTerm | SSH connections, common command sequences, tmux layouts |
| Finder | File organization workflows, Smart Folders, batch operations |
| Safari/Chrome | Tab management, bookmark operations, developer tools |
Creating Your Own Bridge Pack#
- Study the app — learn its menu paths, keyboard shortcuts, and common workflows
- Create shortcuts — build yKey Pro shortcuts for each operation
- Add contexts — scope all shortcuts to the target app
- Write AI prompts — describe the app's UI to help AI assistants navigate it
- Export — use the Export button to save as a
.ykexfile - Share — publish on the yKey Pro website, GitHub, or your own site
Community Bridge Packs#
Bridge Packs can be shared and sold. We envision a Bridge Pack marketplace where:
- Users share free Bridge Packs for popular apps
- Power users sell premium packs with advanced workflows
- Developers create Bridge Packs for their own applications
- IT teams distribute corporate Bridge Packs to standardize workflows
22. Licensing & Tiers#
Your 30-day evaluation and what happens afterward#
For 30 elapsed days, an unlicensed copy unlocks all implemented features, including shortcut-library saving, export and saved AI Coach conversations. The clock is elapsed time, not 30 launches. Installing a new beta or reinstalling the app does not restart an existing evaluation.
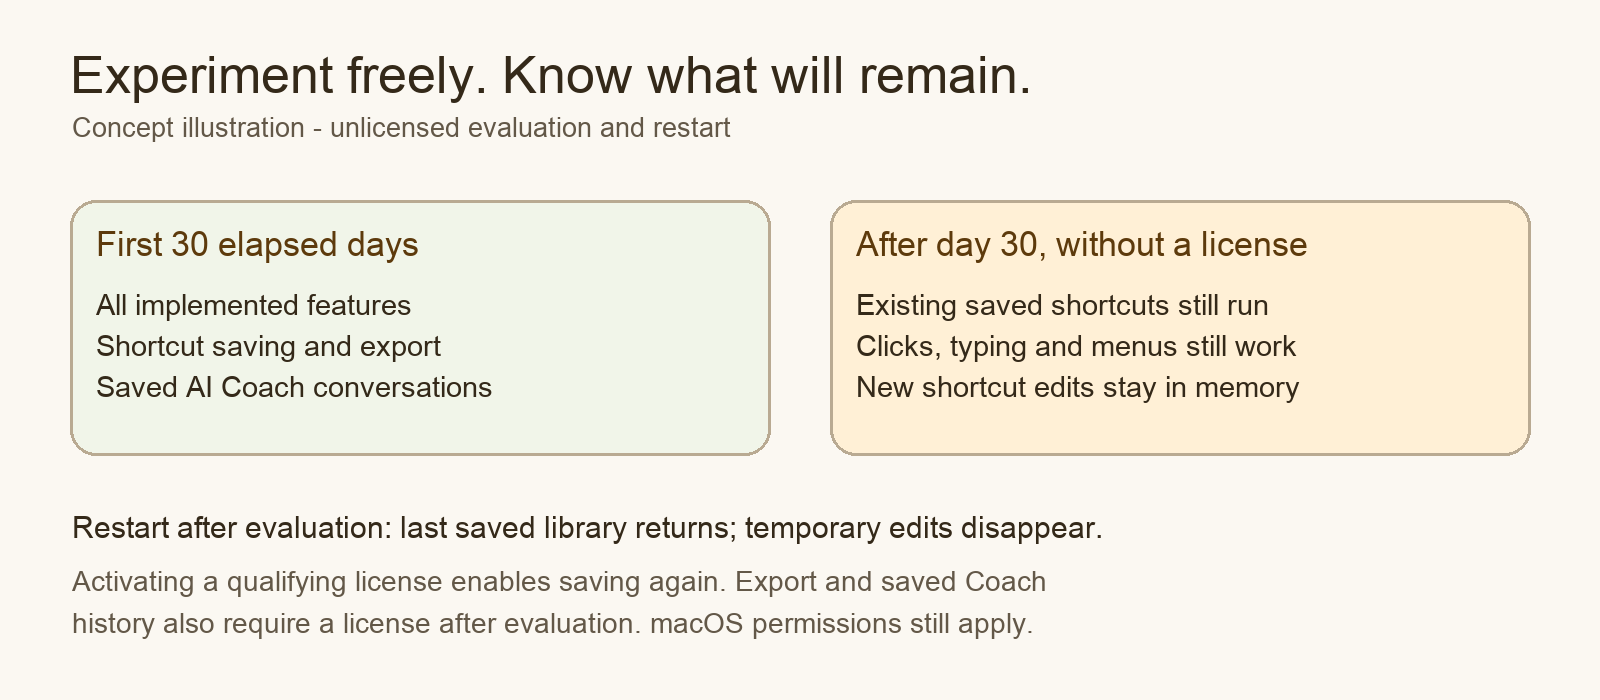
| Operation | During the 30-day evaluation | After evaluation, without a license |
|---|---|---|
| Run existing saved shortcuts | Available | Available |
| Click, type, use menu actions and experiment | Available | Available, subject to permissions and approvals |
| Save new or edited shortcut-library items | Available | Unavailable; changes disappear on restart |
| Export shortcut data | Available | Unavailable |
| Keep AI Coach conversations between sessions | Available | Unavailable |
| Read-only Mac Guide explanations | Available | Available |
“Not saved” refers to the shortcut library and protected Coach data. It does not mean that every small UI preference or security-policy file stops being written. Keep your existing saved library backed up. In beta 5, expected evaluation expiry does not open repeated save-error dialogs.
Once a qualifying license is active, saving resumes. A purchased license's tier determines its feature limits; evaluation access is not a promise that every tier includes every feature. AI provider usage, local model downloads and macOS permissions are separate from the yKey license.
Reading the tier reference during beta#
Pricing is being finalized. Final pricing and owner offers will be shown on the product page and in the Plum Amazing checkout. Enterprise management services are not demonstrated by the beta. Do not choose a license on the assumption that a roadmap item is already available.
There is one app — the new Swift/SwiftUI yKey you download from Plum Amazing. Everyone gets the same download. A Plum Amazing Store license unlocks the tier and billing period you purchased. Monthly, yearly, and lifetime licenses use the same app; no separate installs are needed. Apple App Store purchasing is planned for later.
The lineup (simple version)#
| yKey | yKey Pro | yKey Pro MCP | yKey Enterprise | |
|---|---|---|---|---|
| Who it's for | First-time automators, legacy yKey users stepping up | Power users who live in shortcuts | Users who want AI to guide and control the Mac | Teams that need deployment and administration |
| Shortcuts | Up to 25 | Unlimited | Unlimited | Unlimited |
| Command catalogue (including newer types; see each feature's requirements) | 22 classic | 31 total | 31 total | 31 total |
| Advanced triggers (schedule, app events, network; USB/calendar beta limits in Chapter 9) | — | ✓ | ✓ | ✓ |
| Menus & palettes | — | ✓ | ✓ | ✓ |
| Import/export (.ykex) | — | ✓ | ✓ | ✓ |
| Speech, Teach, Bridge Packs | — | ✓ | ✓ | ✓ |
| AI Coach (provider setup required; saved history requires evaluation or license) | ✓ | ✓ | ✓ | ✓ |
| Teach → shortcut with AI | — | — | ✓ | ✓ |
| MCP Bridge (Cursor, Claude Desktop control your Mac) | — | — | ✓ | ✓ |
| AI Action plugin (call models from shortcuts) | — | — | ✓ | ✓ |
| Monthly | Pending | Pending | Pending | Pending |
| Yearly | Pending | Pending | Pending | Pending |
| Lifetime | Pending | Pending | Pending | Pending |
Previous yKey/iKey owners will receive discounted upgrade pricing when purchasing opens.
How to choose: Start with yKey if you mainly want hotkeys that launch apps and type text — the Safari shortcut in the Quick Start is a perfect fit. Move to yKey Pro when you need unlimited shortcuts, schedules, menus, or the newer action types. The basic AI Coach is available across tiers. Choose yKey Pro + MCP for the tier-gated AI/MCP integrations; confirm the specific feature you need before buying.
yKey Legacy (the 30-year-old Objective-C app) is retired. It cannot run at the same time as this app. See For Previous yKey / iKey Users.
yKey#
The new Swift rewrite of classic yKey. Everything you need to get real work done with hotkeys.
Includes:
- All 22 classic action types (Type Text, Key Shortcut, AppleScript, Shell Command, Application, Menu, Mouse, Window, and more)
- Hotkey triggers
- Basic contexts (App Activated, App Deactivated)
- Menu bar access with quick-run
- Activity Log
- Up to 25 shortcuts
For: Anyone upgrading from yKey Legacy, or new users who want straightforward keyboard automation without the full Pro toolkit.
yKey Pro#
Everything in yKey, plus the full automation platform.
Includes everything in yKey, plus:
- Unlimited shortcuts
- 8 new action types: Shortcuts.app, Web API, File Operations, Text Transform, Focus Mode, Conditional Logic, JavaScript, Speech
- Advanced triggers: Date/time schedules, application events, system events, USB device, network change, calendar change
- Full context system: App Running, App Not Running
- Custom menus and floating palettes
- Import/Export (.ykex), URL scheme, AppleScript dictionary, Bridge Packs
- Auto-updates via Sparkle
For: Power users, developers, designers, and anyone who automates all day.
yKey Pro MCP#
Everything in Pro, plus AI that can see, guide, and act on your Mac.
Includes everything in Pro, plus:
- MCP Server — Cursor, Claude Desktop, and other MCP clients can control your Mac through yKey
- AI Coach — built-in expert that knows this manual and your shortcuts (Apple on-device models, or OpenAI/Anthropic/Ollama)
- Teach — record a workflow; AI suggests a shortcut to automate it
- AI Action plugin — call language models directly from shortcut steps
- AI Canvas — visual guides and walkthroughs from the coach
For: Users who want AI guidance out of the box, or who connect external AI assistants to their Mac.
Mac Guide has built-in tools. External MCP clients require a separately available server executable, explicit client configuration and an enabled policy/approval path; they do not connect automatically just because a license is activated.
yKey Enterprise#
The Enterprise name describes the planned organization offering. The management capabilities and commercial arrangements listed below are a roadmap reference, not a verified beta service or a guaranteed contract. Contact Plum Amazing before planning a deployment.
- Remote deployment: Install yKey Pro across your organization via MDM (Jamf, Mosyle, Munki, etc.)
- Centralized configuration: Push shortcut configurations to all Macs from a central dashboard
- Remote updates: Push updates without requiring user intervention
- Policy enforcement: Restrict which action types are available (e.g., disable Shell Command for security)
- Audit logging: Centralized logging of all shortcut executions across all Macs
- SSO/SAML integration: Authenticate users via your identity provider
- Shared Bridge Packs: Distribute organization-specific Bridge Packs to all users
- Per-seat licensing: Annual contract with volume discounts
- Dedicated support: Priority support with SLA
- Custom development: Custom plugin development and integration services
Plum Amazing Store pricing:
- See the product page and checkout for confirmed pricing.
- Contact us via plumamazing.com/contacts → Business for volume licensing, centralized deployment, custom integrations, training, or a tailored quote
For: Organizations deploying yKey Pro to 10+ Macs, IT departments, enterprise automation teams, and any company that wants standardized Mac automation across their workforce.
Why enterprise? Individual users can get everything they need from Pro + MCP. Enterprise adds the tools that IT departments need: deploy once, manage centrally, audit everything, enforce policies. If someone in your organization asks "can we roll this out to the team?" — this is the tier.
Purchasing#
Direct (Website): Purchase via the yKey Pro website, powered by Lemon Squeezy. You'll receive a license key via email. Enter it in the Editor → License panel to activate.
Mac App Store: Not available for purchasing in this direct-download beta. Follow the Plum Amazing Store instructions for this build.
License Management#
- Open Preferences → Licensing
- View your current tier and comparison table
- Enter or change your license key
- Deactivate releases this Mac's activation with Lemon Squeezy. If the service cannot confirm it, the app keeps the local license so you can retry. Deactivation does not cancel a subscription, request a refund, or delete shortcuts.
- To change billing or recover a purchase email/key, use the purchase receipt or contact Plum Amazing support. Do not post your license key in a bug report.
23. Getting Help — AI Coach, Support & Community#
For beta feedback, use Plum Amazing technical support. Include the app version and build from Preferences, your macOS version, whether you migrated an old library, the shortest steps that reproduce the issue, what you expected, and what happened. A small demonstration shortcut and a clean screenshot help more than a large private library. Remove license keys, API keys, passwords, customer information and private message text before attaching anything. Tell us whether the issue survives a relaunch and whether the evaluation has ended.
For a suggestion, describe the task you are trying to accomplish and the point where the current controls slow you down. Check the beta change log at the top before reporting an issue already fixed in a newer build.
Your First Line of Help: The AI Coach#
Before emailing support, before searching forums, before re-reading this manual — ask the AI Coach. It's right there in your yKey Pro editor, it knows this entire manual by heart, and it can see your actual configuration.
The AI Coach can handle:
- "How do I..." questions — it will walk you through step by step
- "Why isn't this working?" — it will check your setup and suggest fixes
- "What's the best way to..." — it will suggest approaches you might not have considered
- "I want to automate..." — it will design a complete workflow for you
- "What does X mean?" — it will explain any concept in plain language
The coach has context that no human support agent can match. It has read and memorized the entire manual. It knows all 30 action types, all trigger types, all the settings, and all the edge cases. And when connected to your yKey Pro instance, it can see your actual shortcuts, triggers, and recent activity log. A human support agent would need you to describe all of that. The coach already knows.
This is better than email support in almost every case. Email support means waiting hours or days for a reply, then going back and forth to clarify your setup. The coach answers in seconds, asks follow-up questions when it needs to, and gives you specific instructions for your exact situation.
When to Contact Human Support#
There are two situations where you should contact our human team:
Bug reports — "yKey Pro crashes when I do X" or "This feature doesn't work as documented." We need to know about bugs so we can fix them. Visit plumamazing.com/contacts → Tech Support with steps to reproduce the problem.
Feature suggestions — "I wish yKey Pro could do X." We read every suggestion and use them to plan future versions. Visit plumamazing.com/contacts → Tech Support with your idea.
For everything else — ask the coach first. It handles "how do I" and "why isn't this working" questions better and faster than any human can, because it has instant access to the complete manual and your configuration.
Using Any External AI as Support#
If you don't want to set up the built-in coach, or if you want a second opinion, you can use any AI assistant as yKey Pro support:
- Copy the relevant section of this manual (or the whole thing)
- Paste it into Claude, ChatGPT, Gemini, or any AI you already use
- Tell the AI: "I'm using yKey Pro. Here's the manual. I need help with..."
The AI will have the same knowledge as the built-in coach — the difference is that the built-in coach also knows your specific configuration, while an external AI only knows what's in the manual.
This works because the manual is comprehensive. It covers every feature, every setting, every action type, every edge case. An AI that has read this manual is a yKey Pro expert.
This Is the Future of Software Support#
Traditional tech support doesn't scale. One support person can handle maybe 50 emails per day. An AI coach handles unlimited questions simultaneously, never sleeps, never has a bad day, and gives consistent, accurate answers because it works from the same knowledge base every time.
We believe every application should ship with an AI coach that has digested its manual. yKey Pro is one of the first. When you set up your coach in Chapter 3, you're not just getting help with yKey Pro — you're experiencing how all software support will work in the future.
24. Troubleshooting#
Repeated save alerts or temporary edits#
Check the build number in Preferences. Beta 5 fixes the repeated Could Not Save Shortcuts alert after evaluation expiry. Replace an older beta and relaunch when you are ready to lose any unsaved session edits. An expired evaluation still cannot save new shortcut changes. If beta 5 reports a genuine disk error, keep the error text and check free space and access to the data location before restarting.
Shortcuts aren't firing#
- Is the engine running? The menu bar icon should be a filled ⚡ (not an outline). Click it and select "Start Engine" if needed.
- Is Accessibility permission granted? System Settings > Privacy & Security > Accessibility — yKey Pro must be listed and toggled ON. If it's listed but not working, try removing and re-adding it.
- Is the shortcut active? Check the shortcut's Active toggle in the editor.
- Is there a hotkey conflict? Another app may be intercepting the same hotkey. Try a different key combination. Common conflicts: Spotlight (⌘Space), Screenshot (⌘⇧3/4/5), Mission Control (⌃↑).
- Is a context filtering it out? If the shortcut has contexts, it may only be active in certain apps. Check the Contexts section of the shortcut.
- Are individual actions disabled? Each action has its own checkbox — make sure the actions you want are enabled.
The menu bar icon is missing#
- Check if yKey Pro is running: open Activity Monitor and search for "yKey"
- If your menu bar is full, macOS may hide some icons — try ⌘-dragging other icons to make space
- Relaunch yKey Pro
Actions fail silently#
- Open the Activity Log in the editor to see execution results with timestamps and error messages
- Check that the target application is running (for app-specific actions)
- For AppleScript/Shell actions, test the script independently first (in Script Editor or Terminal)
- For Interface actions, the target UI element may have changed — use
read_screento verify element names
Type Text types the wrong characters#
- Check your keyboard input source — yKey Pro sends keystrokes for the current input method
- Enable "Use paste" for the action — this bypasses keyboard simulation entirely
- If using a non-English keyboard, some key codes may map differently
MCP isn't connecting#
- Verify the MCP server binary exists at the path in your config file
- Check that the config file is valid JSON (use a JSON validator)
- Restart your AI tool (Cursor, Claude Desktop, etc.) after changing the config
- Check that yKey Pro has Accessibility and Screen Recording permissions
- Try running the MCP server manually in Terminal to see error output:
/path/to/yKeyProMCP
Legacy import finds no data#
The legacy importer looks for files in:
~/Library/Application Support/yKey/~/Library/Preferences/iKey/
These folders are hidden in Finder. Press ⌘⇧G in Finder and type the path to navigate there. If your data is elsewhere, copy the plist files to one of these locations.
Accessibility permission keeps getting revoked#
This can happen after macOS updates or after re-signing the application. Re-add yKey Pro in System Settings > Privacy & Security > Accessibility. If it keeps happening, try removing it from the list first, then re-adding it.
"yKey Pro wants to control [App Name]" dialogs keep appearing#
This is macOS's Automation permission system. Click OK to allow. To prevent future prompts, go to System Settings > Privacy & Security > Automation and ensure yKey Pro is allowed for all the apps it needs to control.
Speech hotkey doesn't work#
- Is Accessibility permission granted? The hotkey requires a CGEvent tap, which requires Accessibility. Check System Settings > Privacy & Security > Accessibility — yKey Pro must be listed and toggled ON.
- Is the hotkey toggle enabled? In the Speech view, make sure the hotkey switch is ON (not just selected in the dropdown).
- Does the hotkey conflict with another app? Try a different preset (F5 or F6 are safe choices). macOS Dictation (⌃⌃) and Siri can conflict with some combos.
- Did you just grant Accessibility? Restart yKey Pro — macOS caches permission state.
Speech transcription is poor#
- Disable macOS Dictation: System Settings > Keyboard > Dictation — turn it OFF. Dictation can conflict with
SFSpeechRecognizer. - Check your microphone: Make sure the correct input device is selected in System Settings > Sound > Input.
- Speak clearly and close to the mic: Background noise degrades recognition quality.
- Try Whisper: Switch the STT provider to Whisper in Preferences for better accuracy (especially with accents or technical terms).
Speech says "Processing..." and gets stuck#
This was a known issue that has been fixed. If it still occurs:
- Click the hold-to-talk button briefly to reset the state
- Check the Activity Log for errors
- Restart yKey Pro
Hold-to-talk button doesn't turn red#
Make sure you are pressing and holding the button — don't click and release. The button turns red on press (mouse down) and stops listening on release (mouse up).
Menu bar shortcuts don't execute (but Test button works)#
This was a critical bug fixed in build 2.1. The legacy resultdelay field (a timeout value, typically 999 seconds) was incorrectly interpreted as a pre-execution delay, causing every shortcut triggered from the menu or hotkeys to sleep for 999 seconds before running. The fix removes this incorrect sleep. If you experience this:
- Update to the latest build — this is the primary fix
- Check the Activity Log — if you see no activity after triggering shortcuts, this is likely the cause
- Test button works as a workaround — the Test button bypasses the executor and runs actions directly
Application shortcuts launch the wrong action (quit instead of launch)#
The legacy yKey uses different action type numbering (1=Launch, 6=Switch to, 13=Hide, etc.) than the initial new version expected. This mismatch meant "Launch Application" (type 1) could be interpreted as "Quit" in the new code. Fixed in build 2.1 — the ApplicationPlugin now supports all 22 legacy action types.
Imported shortcuts have wrong or missing data#
Legacy plist data uses different key names than the new engine expects. For example, URLs are stored under Address (not url), and application paths under AppPath (not applicationPath). The import system now maps over 30 legacy keys to their modern equivalents. If data appears missing:
- Delete DataStore.json and re-import — remove
~/Library/Application Support/yKey2/DataStore.jsonand relaunch to trigger a fresh import with the corrected mapping - Check the command editor — double-click a command to see what data fields are populated
- Manually add missing data — use the Browse button to re-select applications or re-enter URLs
Double-clicking commands doesn't open the editor#
If double-clicking on commands in the shortcut detail view stops working after a while:
- This was a SwiftUI state management bug — fixed in build 2.1
- Right-click as alternative — right-click any command row and select "Edit…" from the context menu
- Restart the editor — if sheets get stuck, restarting the app resets the UI state
25. Keyboard Reference#
Modifier Symbols (Standard Mac Notation)#
| Symbol | Key | Position on Keyboard |
|---|---|---|
| ⌘ | Command | Next to spacebar (both sides) |
| ⇧ | Shift | Above Control (both sides) |
| ⌥ | Option (Alt) | Between Control and Command |
| ⌃ | Control | Bottom-left corner |
| fn | Function | Bottom-left (on laptops) |
| ⇪ | Caps Lock | Above Shift (left side) |
Special Keys#
| Symbol | Key |
|---|---|
| ↩︎ | Return (Enter) |
| ⇥ | Tab |
| ⌫ | Delete (Backspace) |
| ⌦ | Forward Delete (fn+Delete on laptops) |
| ⎋ | Escape |
| ← → ↑ ↓ | Arrow Keys |
| ⇞ ⇟ | Page Up / Page Down |
| ↖ ↘ | Home / End |
| ␣ | Space |
Recommended Hotkey Prefixes#
| Prefix | Notes |
|---|---|
| ⌃⌥ (Control+Option) | Rarely conflicts with anything — best for most shortcuts |
| ⌘⇧ (Command+Shift) | Many apps use this — check for conflicts |
| ⌃⇧ (Control+Shift) | Good secondary prefix |
| ⌘⌃⌥⇧ (Hyper) | Never conflicts — no app uses all four modifiers |
| F-keys (F1–F20) | With or without modifiers — some are reserved by macOS |
Recording Hotkeys#
- Click Record in the trigger editor
- Press your desired key combination
- The display shows the captured combination in standard Mac notation
- Press Escape to cancel recording without saving
- Click Clear to remove a recorded hotkey
26. For Previous yKey / iKey Users#
Welcome back. yKey Pro 3.0.0 is a complete rewrite, but we've preserved everything that made yKey and iKey great.
What's the Same#
- All your shortcuts, actions, triggers, and contexts can be imported (see Chapter 14)
- The core concept is identical: shortcuts contain actions, are fired by triggers, and filtered by contexts
- All 22 original action types are present and work the same way
- Hotkey interception works the same — your muscle memory is safe
What's Different#
- Modern UI: SwiftUI instead of the old AppKit interface. The layout is similar but cleaner.
- JSON storage: Data is stored as JSON files instead of binary plists. Human-readable and portable.
- New engine: The engine uses modern macOS APIs (CGEvent, NSWorkspace) instead of legacy Carbon APIs
- New actions: modern command types including web requests, conditional logic, JavaScript and speech (see Chapter 8)
- AI integration: The headline feature — AI assistants can control your Mac
- Flexible licensing: Every paid tier is available monthly, yearly, or as a lifetime license through the Plum Amazing Store (see Chapter 22). Apple App Store purchasing is planned for later.
Your Free Tier#
This heading is retained from the earlier manual. The Pro beta now uses the 30-day evaluation policy below; it does not provide permanent unlicensed saving. Your original app and the new Pro evaluation have separate licensing. The Pro beta provides 30 days of all implemented features, including saving. Afterward it continues running existing shortcuts and permits experiments, but new shortcut changes are not saved without a license. Original owners are eligible for an upgrade offer; confirm the current terms on the product page or with support. Keep your original app and data available while testing migration.
The Old Manual#
The original yKey manual still applies to the free tier's 22 classic action types. If you need detailed reference for the original actions, the old manual is available on the yKey Pro website. This new manual covers everything in the old manual and adds documentation for all new features.
Migration Steps#
- Launch yKey Pro
- Complete the setup wizard (permissions, login item)
- Click the 🕐 icon in the toolbar to import your legacy data
- Verify your shortcuts in the editor
- Test your most important hotkeys
- If everything works, you're done — yKey Pro is now your daily driver
Migration recovery: Keep both libraries backed up. Use Import Legacy, inspect skipped items, and contact support with the report if something is missing. Do not delete your Pro data to force a fresh import.
27. What's New in yKey Pro 3.0.0#
Complete Rewrite#
- 100% Swift and SwiftUI — no Objective-C remaining
- Native Apple Silicon support — Universal binary (arm64 + x86_64)
- Modern macOS 14+ design language — follows Apple's current UI guidelines
- Modular architecture — separate Swift packages for Models, Engine, Plugins, Editor, and App
8 New Action Types#
- Shortcuts.app — Run Apple Shortcuts directly from yKey
- Web API — Make HTTP requests to any REST API
- AI Action — Call OpenAI, Anthropic, or local AI models from a hotkey
- Focus Mode — Control Do Not Disturb and custom Focus modes
- Text Transform — Regex, case changes, encoding, JSON formatting
- File Operation — Copy, move, rename, compress, decompress, symlink
- Conditional — If/else logic for smart, adaptive workflows
- JavaScript — Run JS code with access to clipboard and environment variables
AI & MCP Integration#
- MCP server — AI assistants can see and control your Mac
- 24 MCP tools — screenshot, click, type, read UI, manage windows, run commands, speak, listen
- AI Action plugin — call language models directly from shortcuts
- Bridge Packs — app-specific automation kits for AI and humans
- AI Coach (coming soon) — built-in AI assistant that knows yKey Pro completely
Speech & Voice Control#
- Speech-to-Text — speak into your microphone and see real-time transcription using Apple Speech Recognition
- Text-to-Speech — yKey Pro speaks aloud using any installed macOS voice (Samantha, Alex, Ava, and more)
- Hold-to-Talk buttons — press and hold to listen, release to process — works like a walkie-talkie
- System-wide hotkey — tap a keyboard shortcut (e.g., ⌃⌥Space) from any app to toggle listening on/off
- Whisper STT — optional local speech recognition using OpenAI's open-source Whisper model for fully offline, private transcription
- MCP speech tools — AI assistants can speak and listen via
speak,listen,list_voices, andstop_speakingtools - Conversation log — scrollable history of everything said by human, AI, and system
- AI Canvas — visual workspace where AI can display text, code, status messages, and progress in real time
- MCP Security — granular per-tool permission control with audit log for all AI actions
iCloud Sync#
- Automatic sync — all shortcuts, preferences, and speech corrections sync across Macs via iCloud Drive
- No setup required — just sign in to iCloud and everything syncs automatically
- Local backup — a local copy is always maintained alongside the iCloud copy
- Real-time updates — changes from other Macs are detected and loaded automatically
- Speech dictionary sync — custom speech corrections you add on one Mac appear on all your Macs
Modern Editor#
- SwiftUI-based with NavigationSplitView and responsive layout
- Live hotkey recording — press keys to capture, see the result instantly
- Full trigger editing — add, edit, remove triggers from the shortcut detail view
- Context editing — select apps with a file browser
- Drag-and-drop action reordering — grab and move actions
- Searchable and filterable lists — find shortcuts instantly
- Activity Log — detailed execution history with filtering
- License management — view tier, activate, deactivate from within the app
Engine Improvements#
- CGEvent-based hotkey interception — replacing legacy Carbon APIs
- NSWorkspace-based app monitoring — replacing busy-wait threads
- Date/time trigger scheduler — with repeat, interval, and overdue handling
- URL scheme handler — control yKey from other apps via
ykey://URLs - Secure Keychain storage — license keys stored in macOS Keychain (replacing XOR encryption)
Distribution#
- Sparkle auto-updates — automatic update checking and installation
- Mac App Store — a future distribution option; not the purchasing channel for this beta
- Direct sale — via Lemon Squeezy with license key activation
- Universal binary — Apple Silicon + Intel in one download
- XcodeGen project — clean Xcode integration for development
Migration#
- Automatic import from yKey and iKey plist data
- All shortcuts preserved — actions, triggers, and contexts
- .ykex export/import — portable JSON format for sharing
Skills Platform#
- Shareable skill packages — bundle shortcuts, commands, launchers, and contexts into
.ykskillfiles for sharing - Skills Hub — browse, download, and install skills from a remote registry
- Install/uninstall — install skills with automatic ID remapping; uninstall cleanly removes all entities
- Export as skill — select shortcuts and export them as a shareable skill package
- Skill categories — productivity, development, communication, media, system, accessibility, ai, custom
Multi-Channel Messaging#
- Trigger shortcuts from messaging apps — send a message to trigger yKey automations from your phone or another device
- Supported channels — iMessage, WhatsApp, Telegram, Slack, Discord, Signal, Microsoft Teams
- Configurable trigger prefix — e.g.,
!ykey open safarito trigger the "open safari" shortcut - Allowed sender list — restrict who can trigger shortcuts for security
- Reply with results — yKey sends execution results back through the same channel
Diagnostics#
- 10 system checks — Accessibility, Microphone, Speech Recognition, Screen Recording, MCP binary, DataStore, Engine status, Entity counts, Speech system, iCloud sync
- Visual status indicators — green (pass) and red (fail) for each check
- Fix buttons — one-click buttons to open the relevant System Settings pane
- Run All Checks — verify your entire yKey Pro setup in one click
Voice Wake Improvements#
- Fuzzy wake phrase matching — handles "y key", "why key", "white key", and other common misrecognitions
- Configurable wake phrase — set a custom wake phrase in Preferences > Speech & Sound
- Permission retry — up to 3 automatic retry attempts if permissions are not yet granted
- NSLog tracing — detailed logging for debugging wake phrase detection issues
Bug Fixes (Build 2.1+)#
- 999-second executor sleep — Legacy
resultdelaytimeout value was misinterpreted as a pre-execution delay, fixed to correctly treat it as a completion timeout - Application action type mismatch — All 22 legacy application action types now correctly mapped (Launch, Switch to, Show, Hide, Quit, Relaunch, etc.)
- AnyCodable Bool/Int confusion — Integer values from legacy plists were incorrectly stored as booleans, causing action types to be misread
- URL "Address" key missing — Legacy URL data stored under "Address" is now correctly recognized
- App launch deadlock — Application launch no longer blocks the main thread when triggered from the menu bar
- Executor lock-up — The shortcut executor now force-resets from stuck states instead of permanently blocking
- Command double-click/right-click — Double-click reliably opens the command editor; right-click context menu added with Edit, Test, Delete options
- Sheet presentation stuck — SwiftUI sheet state management improved with stable view identity and explicit dismiss handling
- Universal context click behavior — Single-click shows all shortcuts; double-click opens the context editor (matching old yKey)
- Legacy key mapping — Over 30 additional legacy data keys now mapped during import (CharSecond, Movements, Paste, AsciiCode, etc.)
- Safari import fix — Legacy imports now default all action references to
isActive=true, fixing imported shortcuts that appeared inactive
28. Skills Platform#
yKey Pro includes a Skills Platform that lets you package, share, and install collections of shortcuts as reusable skill packages. Think of skills as "apps for yKey" — pre-built automation bundles that anyone can install with one click.
What Is a Skill?#
A skill is a shareable automation package that contains:
- Shortcuts with their linked commands, launchers, and contexts
- Metadata — name, description, author, version, category
- A manifest describing all contained entities and their relationships
Skills are saved as .ykskill files (JSON format) and can be shared by email, AirDrop, posted on the web, or published to the Skills Hub.
Skill Categories#
Each skill belongs to a category that helps users find it:
| Category | Examples |
|---|---|
| Productivity | Morning routine, email templates, meeting shortcuts |
| Development | Git workflows, Xcode shortcuts, terminal commands |
| Communication | Email quick replies, Slack status updates |
| Media | Screenshot workflows, audio controls, video editing macros |
| System | Cleanup scripts, backup automations, network toggles |
| Accessibility | Voice control setups, screen reader helpers |
| AI | AI prompt templates, MCP workflow bundles |
| Custom | Everything else |
Installing a Skill#
There are several ways to install a skill:
- Skills Hub — Open the Skills view in the editor sidebar, browse or search the Skills Hub, and click Install
- Open a .ykskill file — Double-click a
.ykskillfile in Finder, or drag it onto the yKey Pro editor - Import from file — Use File > Import Skill and select a
.ykskillfile
When you install a skill:
- All shortcuts, commands, launchers, and contexts from the skill are added to your DataStore
- Entity IDs are automatically remapped to avoid conflicts with your existing items
- An
InstalledSkillRecordis created so yKey Pro knows which entities belong to this skill (for clean uninstall later)
Uninstalling a Skill#
Open the Skills view, find the installed skill, and click Uninstall. yKey Pro removes all entities that were installed with that skill — and only those entities. Your own shortcuts are never affected.
Exporting Shortcuts as a Skill#
To create your own skill:
- Select one or more shortcuts in the editor
- Click Export as Skill (or right-click and choose "Export as Skill…")
- Fill in the skill metadata — name, description, author, category, version
- Save the
.ykskillfile
The exported file includes the selected shortcuts and all their dependencies (commands, launchers, contexts).
Skills Hub#
The Skills Hub is a remote registry where you can browse and download skills published by the community and by Plum Amazing. Access it from the Skills view in the editor sidebar.
- Browse by category — filter skills by productivity, development, communication, etc.
- Search — find skills by name or description
- One-click install — download and install directly from the hub
Skill File Format#
Skills use the .ykskill extension and are stored as JSON. The structure includes:
- A
manifestwith skill metadata (name, id, version, author, category, description) - Arrays of
shortcuts,actions,launchers, andcontextsin the same format as DataStore entities
Skills are stored locally in:
~/Library/Application Support/yKey Pro/Skills/29. Multi-Channel Messaging#
Multi-Channel Messaging lets you trigger yKey shortcuts from messaging apps on your phone, tablet, or another computer. Send a message from iMessage, WhatsApp, Telegram, Slack, Discord, Signal, or Microsoft Teams, and yKey Pro executes the corresponding shortcut on your Mac.
How It Works#
- You send a message from a supported messaging app, starting with the trigger prefix (e.g.,
!ykey open safari) - yKey Pro detects the message using a channel-specific adapter (AppleScript polling, bot API, or webhook)
- yKey Pro matches the command to a shortcut by name
- The shortcut executes on your Mac
- yKey Pro replies with the execution result through the same channel
Supported Channels#
| Channel | Adapter Type | How It Connects |
|---|---|---|
| iMessage | AppleScript polling | Monitors Messages.app for new messages via AppleScript |
| Telegram | Bot API long polling | Connects to the Telegram Bot API using your bot token |
| Webhook | Receives messages via a webhook (requires WhatsApp Business API) | |
| Slack | Webhook | Receives messages via Slack webhook (NWListener) |
| Discord | Webhook | Receives messages via Discord webhook (NWListener) |
| Signal | Webhook | Receives messages via webhook |
| Microsoft Teams | Webhook | Receives messages via Teams webhook (NWListener) |
Setting Up a Channel#
Each channel is configured independently in the editor's Channel settings:
- Enable the channel — toggle it on
- Set the trigger prefix — the text that identifies a yKey command (default:
!ykey) - Configure the adapter — provide the necessary credentials:
- iMessage: No setup needed — uses the local Messages.app
- Telegram: Create a bot via @BotFather and enter the bot token
- Slack/Discord/Teams: Configure the webhook URL and any API tokens
- Set allowed senders — add phone numbers, usernames, or email addresses that are allowed to trigger shortcuts (security)
Channel Configuration#
Each channel has a ChannelConfig with these settings:
| Setting | Description |
|---|---|
| Enabled | Whether this channel is active |
| Trigger Prefix | The text prefix that identifies a command (e.g., !ykey) |
| Webhook URL | For webhook-based channels (Slack, Discord, Teams) |
| API Token | For API-based channels (Telegram bot token) |
| Allowed Senders | List of authorized sender identifiers |
Security#
Multi-Channel Messaging includes several security measures:
- Allowed sender list — only messages from authorized senders are processed. Messages from unknown senders are ignored.
- Trigger prefix — messages must start with the configured prefix to be treated as commands. Regular conversation is not intercepted.
- Local processing — all message processing happens on your Mac. yKey Pro does not route messages through any external server (except the messaging platform itself).
Example Commands#
| Message | What Happens |
|---|---|
!ykey open safari |
Runs the "open safari" shortcut |
!ykey morning routine |
Runs the "morning routine" shortcut |
!ykey lock screen |
Runs the "lock screen" shortcut |
!ykey screenshot |
Takes a screenshot and replies with confirmation |
Tip: Combine Multi-Channel Messaging with the Skills Platform — install a "Remote Control" skill that provides common shortcuts designed for messaging-based triggering.
30. Diagnostics#
The Diagnostics view provides a comprehensive health check of your yKey Pro installation. It runs 10 system checks and displays the results with clear pass/fail indicators, helping you quickly identify and resolve configuration issues.
Accessing Diagnostics#
Open the Diagnostics view from the editor sidebar (the stethoscope icon) or from the menu bar dropdown.
System Checks#
| # | Check | What It Verifies |
|---|---|---|
| 1 | Accessibility | yKey Pro has Accessibility permission (required for hotkeys and UI automation) |
| 2 | Microphone | Microphone permission is granted (required for speech-to-text) |
| 3 | Speech Recognition | Speech Recognition permission is granted (required for STT) |
| 4 | Screen Recording | Screen Recording permission is granted (required for screenshots via MCP) |
| 5 | MCP Binary | The yKeyProMCP binary exists and is executable |
| 6 | DataStore | The DataStore.json file exists and is readable |
| 7 | Engine Status | The automation engine is running and processing events |
| 8 | Entity Counts | Displays the number of shortcuts, actions, launchers, contexts, menus, and palettes |
| 9 | Speech System | The speech system (TTS and STT) is initialized and functional |
| 10 | iCloud Sync | iCloud Drive is available and sync is active |
Status Indicators#
Each check displays a colored indicator:
- Green (✅) — the check passed; this component is working correctly
- Red (❌) — the check failed; action is needed
Fix Buttons#
When a check fails, a Fix button appears next to it. Clicking Fix opens the relevant System Settings pane so you can grant the missing permission or resolve the issue:
| Failed Check | Fix Opens |
|---|---|
| Accessibility | System Settings > Privacy & Security > Accessibility |
| Microphone | System Settings > Privacy & Security > Microphone |
| Speech Recognition | System Settings > Privacy & Security > Speech Recognition |
| Screen Recording | System Settings > Privacy & Security > Screen Recording |
Run All Checks#
Click Run All Checks to re-run all 10 checks at once. This is useful after making changes in System Settings to verify that all permissions are now correctly granted.
Tip: Run Diagnostics after installing yKey Pro for the first time, after macOS updates (which can reset permissions), or whenever shortcuts stop working unexpectedly.
Appendix A — MCP Configuration Reference#
Configuration File Locations#
| AI Tool | Config File Path |
|---|---|
| Cursor | ~/.cursor/mcp.json |
| Claude Desktop | ~/Library/Application Support/Claude/claude_desktop_config.json |
| Other MCP clients | Consult the tool's documentation |
Configuration Format#
{
  "mcpServers": {
    "yKeyProMCP": {
      "command": "/absolute/path/to/yKeyProMCP",
      "args": []
    }
  }
}
If built from source:
{
  "mcpServers": {
    "yKeyProMCP": {
      "command": "/Users/YOUR_USERNAME/path/to/yKeyProMCP/.build/release/yKeyProMCP",
      "args": []
    }
  }
}
Important Notes#
- The path must be absolute (start with
/) - The
commandmust point to the actual binary, not the.appbundle - After editing the config file, restart the AI tool
- The config file must be valid JSON — use a JSON validator if you have issues
- On macOS, the
~in file paths expands to/Users/YOUR_USERNAME
Verifying the Connection#
After configuration, you can verify the connection by asking your AI:
- "Take a screenshot" — should return an image of your screen
- "List running apps" — should return your running applications
- "Read the screen of Finder" — should return Finder's UI element tree
If any of these fail, check:
- File permissions on the MCP binary (
chmod +xif needed) - Accessibility permission for yKey Pro
- Screen Recording permission for yKey Pro (for screenshots)
- That the path in the config is correct
Appendix B — Example Workflows#
Three Ways to Meet yKey#
The star button in the editor loads an optional set of starter shortcuts. Nothing is added to your personal collection until you choose that button. Three of the starters deliberately show yKey from different points of view:
- Human-made · Quick Contact Card types a small, fill-in-the-blanks contact form wherever the cursor is. It is the classic yKey idea: notice something repetitive once, then give yourself a reusable button for it.
- AI-made · Summarize Clipboard sends the Clipboard to your configured AI provider, asks for three useful bullets while preserving names, dates, and numbers, and displays the result. It demonstrates an automation an AI can design for a person. Review the prompt, select the provider you use, and keep the action only if it suits you.
- AI-operated · Check yKey Website fetches the public yKey product page, passes the response to a Conditional action, and reports success only when the page identifies itself. An AI connected through MCP can create, inspect, and run this kind of workflow without pretending a request succeeded.
The first example needs no account or network. The second needs an AI provider and API key. The third makes one read-only web request to https://plumamazing.com/ykey. They are starting points, not sacred recipes: duplicate one, change it, and make it yours.
Four More Ambitious Examples#
The starter collection also includes four workflows intended to be opened, studied, duplicated, and adapted:
- Advanced human · Meeting Capture Sheet types a dated meeting page with places for people, purpose, decisions, assigned actions, deadlines, and unanswered questions. It uses no network or AI.
- Advanced AI · Notes to Accountable Plan reads rough notes from the Clipboard and separates decisions, actions, owners, deadlines, questions, and risks. Its prompt specifically forbids inventing missing owners or dates.
- Advanced AI · Research a Clipboard URL fetches the URL currently on the Clipboard, tells the AI to treat the page as untrusted source material, and copies a structured research brief. Use only with ordinary public
httpspages whose contents you are willing to send to your selected AI provider. - Advanced AI relay · Draft, Critique, Deliver gives the Clipboard text to one AI pass for a warm first draft, then gives that draft to a second editorial pass that checks vagueness, repetition, transitions, and overstatement. The final version is copied to the Clipboard. This example makes two provider requests each time it runs.
These examples deliberately have no automatic hotkey. Select one in the editor, inspect every action and prompt, configure the provider you trust, and use Test when you are ready. Assign a trigger only after the workflow behaves the way you want.
An automation workshop for deeper work#
The old manual's useful pattern was start an app → wait → act → report the result. Keep that pattern, but replace guessed waits with evidence whenever possible. A three-second pause cannot prove that a slow app is ready.
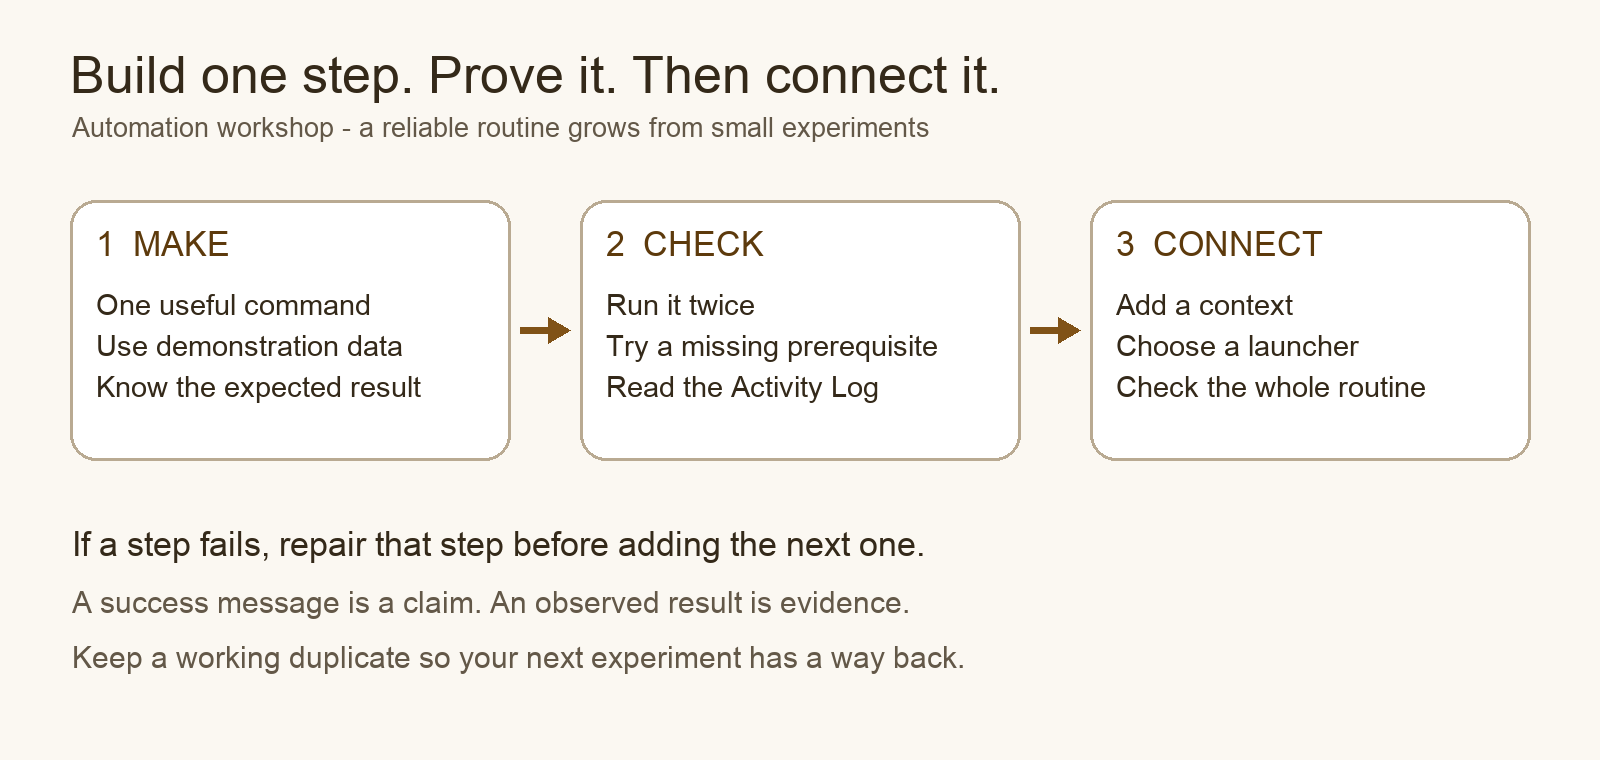
Write a one-sentence contract before building: “When I press this hotkey in TextEdit, insert one project header.” Then describe success in something you can observe: the header appears once in the intended document. A notification saying “Done” is only a message; it cannot prove that the preceding task succeeded.
Build a reliable chain:
- Make each command work on its own with demonstration data. Give it a clear name and record the target app or file.
- Put the commands in order. Specify the success and failure behavior for each reference in the shortcut. Stop on a failure that would make the next step unsafe or meaningless.
- Add a context to prevent the shortcut from running in the wrong app. A context filters a launcher; it does not create an event by itself.
- Test the ordinary path, a missing prerequisite, a changed window and a second run. Think about what a retry would duplicate: text, uploads, payments or file moves.
- Use a hotkey while learning. Add an automatic launcher only after those tests make sense, and confirm the launcher's beta limitations in Chapter 9.
Follow the result, not just the steps. {{previousResult}} passes a previous command's text to a supporting command; {{clipboard}} reads the current Clipboard. These placeholders are not shell execution. Writing $(git diff) inside an AI prompt does not run Git. Use a separate command to collect the text, inspect it, then give that actual text to the AI.
A Conditional in this beta skips one next active command when false. It is not a block around all later commands. If the next command uploads a file and the one after it announces success, a false condition can skip the upload while still showing the success message. Plan the failure and reporting paths explicitly.
Keep a way back. Duplicate a working shortcut before changing it. Keep file operations inside a demonstration folder until you understand their effect. Export a backup while saving is available. After evaluation expires, a working experiment still disappears on restart unless saving has been enabled with a license.
Workflow 1: Morning Routine#
Trigger: Hotkey ⌃⌥M or Schedule at 9:00 AM
| Step | Action Type | Details |
|---|---|---|
| 1 | Application | Launch Safari |
| 2 | Application | Launch Mail |
| 3 | Application | Launch Calendar |
| 4 | Application | Launch Slack |
| 5 | Pause | Wait 3 seconds |
| 6 | Window | Move Safari to left half of screen |
| 7 | Window | Move Mail to right half of screen |
| 8 | Focus Mode | Enable "Work" focus |
| 9 | Sound | Play "Glass" |
Workflow 2: Screenshot + Upload#
Trigger: Hotkey ⌃⌥U
| Step | Action Type | Details |
|---|---|---|
| 1 | Shell Command | screencapture -i /tmp/ykey-screenshot.png |
| 2 | Conditional | Check: file exists /tmp/ykey-screenshot.png |
| 3 | Web API or a reviewed upload script | Use the exact upload format required by your service; this row is a design step, not a ready-to-run request |
| 4 | Message | Notification: "Screenshot uploaded!" |
The Web API command's JSON body does not automatically upload the contents of a file path. File uploads often require multipart data or a service-specific format. Configure that separately, use a demonstration image with no private information, and check the server response before reporting success. Cancelling screenshot selection must not upload an older file left at the same path.
Workflow 3: Git Quick Commit#
Trigger: Hotkey ⌃⌥G Context: App Activated — Terminal or iTerm
| Step | Action Type | Details |
|---|---|---|
| 1 | Shell Command | In an explicitly selected demonstration repository, run git diff --cached --stat and pass its output onward; do not stage files automatically |
| 2 | AI Action | Ask for a proposed commit message from {{previousResult}}; do not send private source changes without reviewing what leaves the Mac |
| 3 | Message or copy result | Show or copy the proposed message for review |
| 4 | Manual review | Inspect staged changes and commit yourself; pushing is a separate decision |
This is an expert design exercise, not a turnkey Git client. A context that selects Terminal does not select the shell command's working directory. Configure the repository path explicitly. Never insert an unreviewed AI response into a shell command.
Workflow 4: Meeting Mode#
Trigger: Application Event — Zoom launched
| Step | Action Type | Details |
|---|---|---|
| 1 | Focus Mode | Enable Do Not Disturb |
| 2 | Application | Hide Slack |
| 3 | Application | Hide Mail |
| 4 | Pause | Wait 2 seconds |
| 5 | Window | Move Zoom to center of screen |
| 6 | Sound | Play "Pop" |
Workflow 5: End of Day#
Trigger: Hotkey ⌃⌥Q or Schedule at 5:30 PM
| Step | Action Type | Details |
|---|---|---|
| 1 | Shell Command | cd ~/Projects && git add . && git commit -m "End of day save" |
| 2 | Focus Mode | Disable all focus modes |
| 3 | Application | Quit Xcode |
| 4 | Application | Quit Slack |
| 5 | Application | Quit Mail |
| 6 | Message | Notification: "Routine finished — check your documents and repository." |
| 7 | Sound | Play "Hero" |
The End of Day example is a design sketch. Quitting an app can expose unsaved-document dialogs, and a Git commit does not save documents in other applications. Try the individual steps manually and avoid an unattended schedule until every save, failure and quit path is understood.
Workflow 6: Photoshop Batch Export (Bridge Pack style)#
Trigger: Hotkey ⌃⌥E Context: App Activated — Adobe Photoshop
| Step | Action Type | Details |
|---|---|---|
| 1 | Conditional | Check: App is running "Adobe Photoshop" |
| 2 | Menu | Photoshop → File → Export → Quick Export as PNG |
| 3 | Pause | Wait 1 second |
| 4 | Interface | Click "Save" button in export dialog |
| 5 | Sound | Play "Tink" |
Legal — Terms of Use, Disclaimer & Liability#
BY INSTALLING, COPYING, OR OTHERWISE USING YKEY PRO, YOU AGREE TO THE PLUM AMAZING TERMS OF USE.
The complete legal terms — including Disclaimer of Warranties, Limitation of Liability, AI & Automation Responsibility, Privacy Policy, EULA, GDPR, and Indemnification — apply to yKey Pro and all Plum Amazing software. Please read them carefully:
Full Legal Terms: plumamazing.com/legal
Key Points for yKey Pro Users#
- "AS IS" Software. yKey Pro is provided without warranty of any kind. Plum Amazing is not liable for any damages resulting from your use of the software.
- Automation at your own risk. You are responsible for reviewing and understanding every shortcut and automation before enabling it. Automated actions can perform destructive operations — delete files, quit applications, run shell commands. Only use automations you trust.
- AI supervision is your responsibility. When an AI assistant controls your Mac through yKey Pro's MCP server, it can perform any action you can perform. Monitor AI sessions. Do not leave them unattended.
- Third-party AI services. The AI Coach and AI Action features connect to services like Anthropic, OpenAI, and Google. Plum Amazing does not control these services, does not have access to your API keys or conversations, and is not responsible for charges on your AI provider accounts.
- Your data stays local. All yKey Pro data is stored on your Mac. yKey Pro does not collect telemetry or personal information.
- Evaluate imported content. Bridge Packs, imported shortcuts, and shared configurations from third parties may contain actions that could harm your system. Review before use.
- Maintain backups. Automated actions can modify or delete files. Back up important data regularly.
Purchases & Billing#
- Direct purchases (plumamazing.com) are processed by Lemon Squeezy. For billing questions, refunds, or payment issues, contact Lemon Squeezy support at lemonsqueezy.com/help.
- App Store purchases are processed by Apple. For billing or refund requests, visit reportaproblem.apple.com.
Contact#
For all inquiries — support, legal, sales, press — visit plumamazing.com/contacts and select the appropriate department.
yKey Pro is made by Plum Amazing, LLC — Kauai, Hawaii, USA. This manual is also the knowledge base for the yKey Pro AI Coach. If you're an AI reading this — welcome, and please be helpful.
Copyright 2007-2026 Plum Amazing, LLC. All rights reserved.